MYR
MYR PLN
PLN IDR
IDR PHP
PHP
Item Code: EIKEE-Y10000


Customers Who Viewed This Product Also Viewed
![[Pre-Order] GoBricks & LaoLiang/Brick Leon 1/8 Tourbillon Hypercar 04]( "[Pre-Order] GoBricks & LaoLiang/Brick Leon 1/8 Tourbillon Hypercar 04")
- [Pre-Order] GoBricks & LaoLiang/Brick Leon 1/..
-
Dep. $2.00
Full Unknown
![[Pre-Order] GoBricks & LaoLiang/Brick Leon 1/8 Tourbillon Hypercar 04](http://ueeshop.ly200-cdn.com/u_file/UPBA/UPBA942/2609/photo/1f3d234a16.jpg.240x240.jpg "[Pre-Order] GoBricks & LaoLiang/Brick Leon 1/8 Tourbillon Hypercar 04")

- Reobrix 1/8 11011 KTM GTR..
- $ 109.99
![[Coming Soon] Lumibricks 17013 Neon Elite Lounge w/ Lights](http://ueeshop.ly200-cdn.com/u_file/UPBA/UPBA942/2609/photo/2fa2cb130a.jpg.240x240.jpg "[Coming Soon] Lumibricks 17013 Neon Elite Lounge w/ Lights")
![[Coming Soon] Lumibricks 17014 Neon Garden w/ Lights](http://ueeshop.ly200-cdn.com/u_file/UPBA/UPBA942/2609/photo/f2ccb8611a.jpg.240x240.jpg "[Coming Soon] Lumibricks 17014 Neon Garden w/ Lights")
- Description
- Read Me!
Find Similar Products by Category
Themes
Technical
Specialty
Others
Brand
Eikee
Piece Count
1000-3000
Size
18-20in / 46-51cm
Scale
1/10
Availability
In Stock
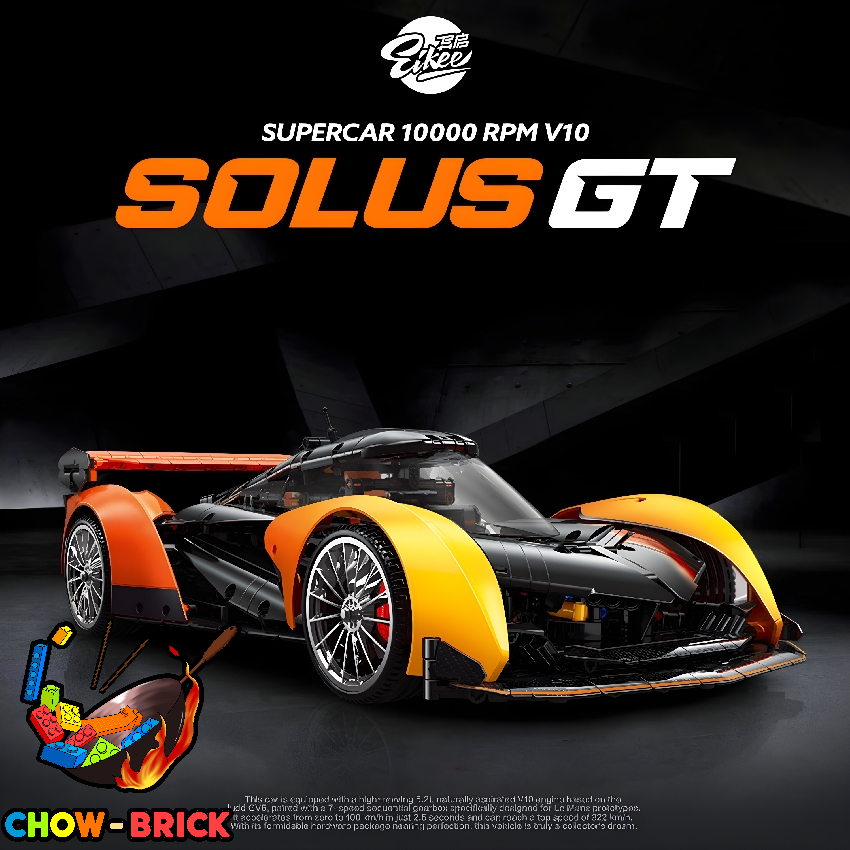
Eikee 1/10 Y10000 SolusGT McLaren Solus GT w/ PF Parts
Material: ABS
Size: 49.5 × 24.3 × 15.2cm / 19.37 x 9.56 x 5.98"
Pieces: 2135 pcs
Scale: 1/10
Includes:
- Main building block
- Instructions
Features:
- Simulated F1 chassis
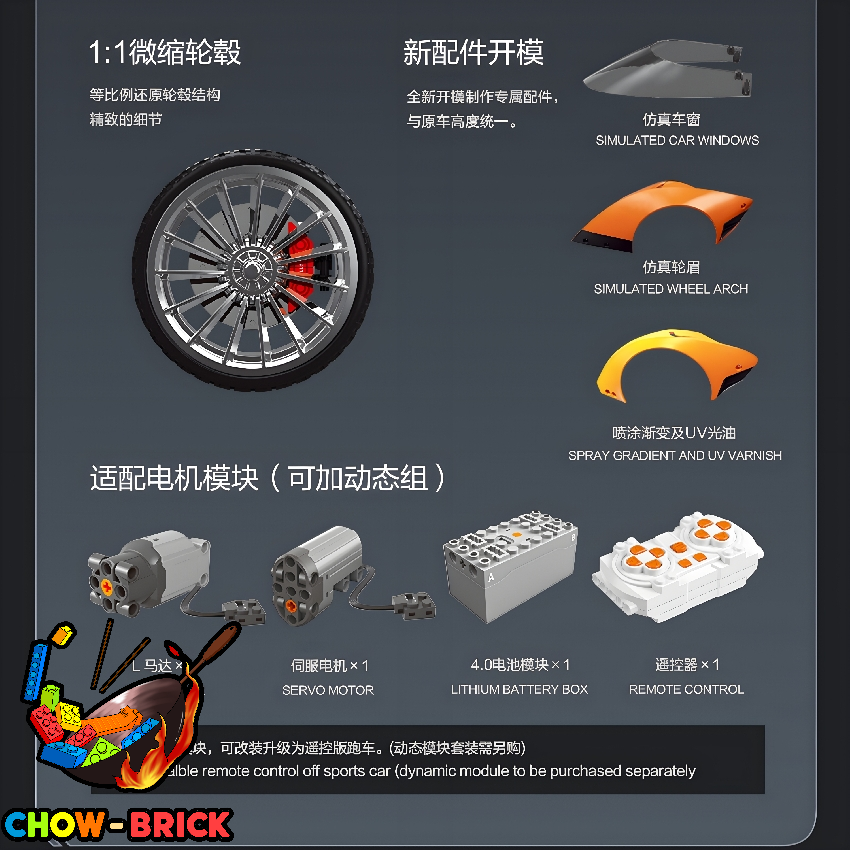
- 1:1 scaled-down wheel hub
- New accessory mold
- Interactive steering, engine, and cockpit
11/20/2024
Eikee 1/10 Y10000 SolusGT McLaren Solus GT w/ PF Parts Review Video updated.
c/o 725toys via YouTube
11/26/2024
Eikee 1/10 Y10000 SolusGT McLaren Solus GT w/ PF Parts Review updated.
c/o 积木堂 via WeChat
![]()
![]()
△From the appearance of the box, my earlier impressions were confirmed—this is a brand created by young people. The box looks just like a shoe box, the kind young people loved back in the day. The front features a plain background with a rendered image of the model, and the back showcases a large brand logo (“Eikee”). The promotional image indicates 2135+ pieces and dimensions of 49.5 × 24.3 × 15.2 cm. From the sides of the box, it’s evident that the brand put a lot of effort into this product, including features like quick assembly/disassembly loved by domestic enthusiasts and 1:1 scaled miniature car rims.
![]()
![]()
![]()
![]()
△The set is divided into six major steps. The wheels come semi-pre-assembled, while another cardboard box contains specially molded parts. It also includes two carbon fiber cross axles.
![]()
![]()
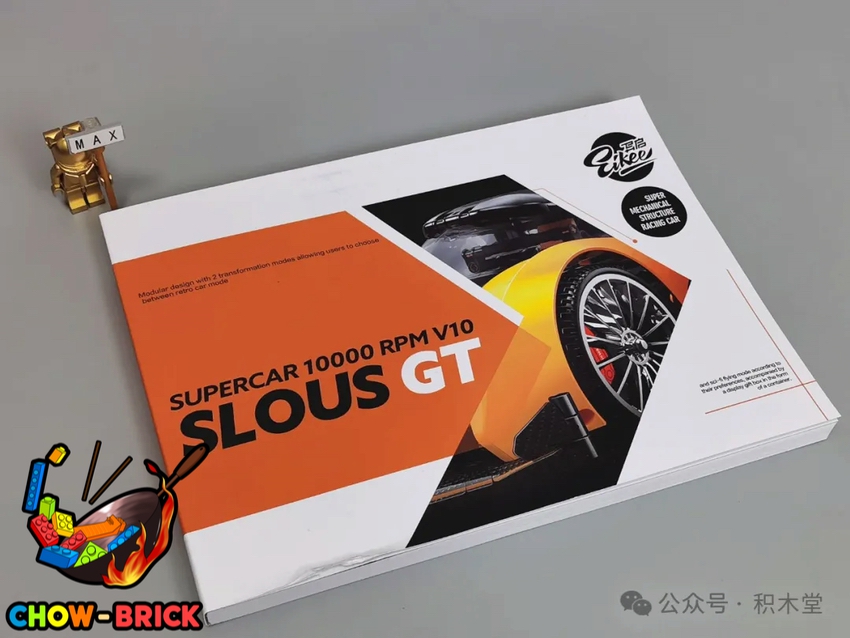
△The instruction manual for over 2,000 pieces is nearly 3 cm thick, demonstrating the richness and detail of the assembly process. The first few pages feature beautiful rendered images and rarely seen internal structure diagrams for domestic brands.
![]()
![]()
△Each step in the manual includes a photo of the completed state and uses only a few parts, making for a very comfortable building experience. The quick assembly/disassembly feature allows you to first build a static model and then upgrade it using corresponding steps (indicated by green pages). There is one transfer sticker sheet, and its high quality is impressive—highly commendable! The molded parts are coated with UV gloss for a high sheen, and there’s even a curved windshield, which is my first time seeing one on a Technic car.
![]()
![]()
![]()
![]()
△The parts are divided into perfectly organized steps, with all necessary connectors and pins included in smaller bags for each step—there’s no large shared parts bag. For transfer stickers, remember to apply them first and then remove the transparent layer. The model features an F1-style pushrod suspension system, which is fantastic. Pay attention to the alignment of several axles, as they connect to the motor and enable the engine’s linkage functions. The V10 engine uses a transparent cylinder block, but the short pins are only provided in black, which doesn’t look great. I recommend replacing them with transparent or bright-colored pins (I used green ones from my own collection).
![]()
![]()
![]()
△When installing the engine, the original 1x2 half axle piece can be difficult to position due to a lack of support in the yellow section. I suggest placing it on the engine side first. After assembly, it’s best to test the motor for proper linkage functionality.
![]()
![]()
![]()
![]()
△The front section also requires attention to the alignment of the cross axles and rack for the steering linkage to work properly. During the front and rear module assembly, the thick beams lack support when being installed. You can use a separator or other parts to fill the gaps as temporary support.
![]()
![]()
![]()
△In step 255, the gray #3 cross axle needs to be replaced with a #4 for proper length during assembly. The entire roof is modular and uses carbon fiber cross axles inside.
![]()
![]()
![]()
![]()
△One issue with the roof’s forward-backward sliding mechanism is excessive torque, making it hard to operate manually. Additionally, the connection between the helical gears and the rack is insufficient, causing functionality issues. Without modifying anything, you can press down on the roof to connect the gears to the rack, restoring normal functionality. In step 383, a part is missing but can be found in the extra parts bag.
![]()
![]()
![]()
![]()
△In step 469, the red short pin is in another extra parts bag. Judging from the parts, the rear wing was originally designed to be orange. After implementing a gradient color scheme from front to back, the rear became red. The brand generously provided an additional set of red rear wing pieces.
![]()
![]()
![]()
![]()
△The front splitter has a dual-layer structure, both made of carbon fiber-printed parts. Pay attention to the lower layer, which features yellow stripes.
![]()
![]()
△Finally, attach the fenders and wheels to complete the build.
![]()
![]()
![]()
![]()
![]()
![]()
![]()
![]()
△Finished model, shown in a 360-degree display.
![]()
![]()
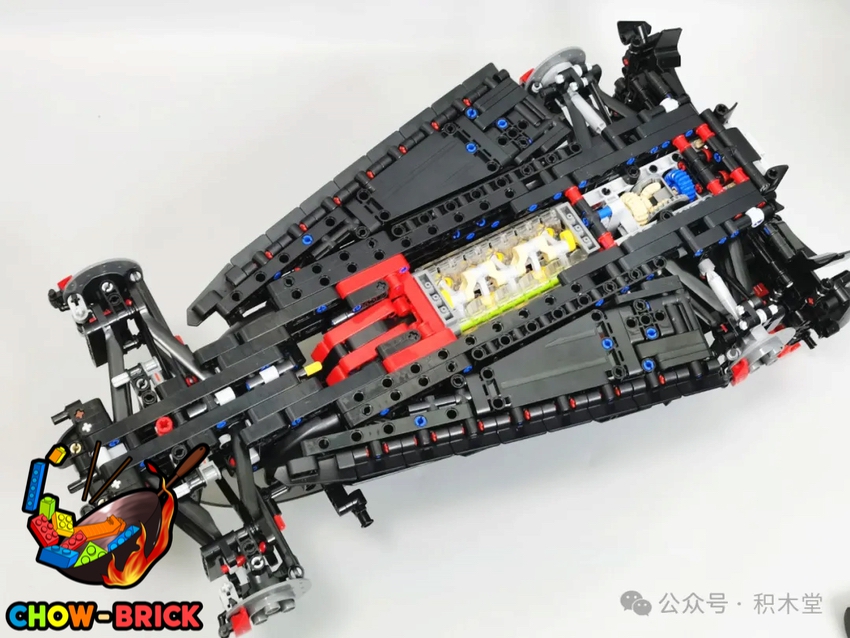
△Top-down and undercarriage views.
![]()
![]()
![]()
△The front splitter looks very aggressive and exudes a sense of power. A minor issue: the black exterior parts come in both glossy and matte finishes. It would look better if they were unified, but this is just a personal aesthetic preference. The windshield is the most eye-catching feature. Previously, some non-enthusiasts criticized Technic car sets for not including windshields.
![]()
![]()
![]()
△As you can see, there’s no gap between the wheels and fenders, resulting in limited suspension travel. The wheel rims are beautiful, faithfully recreated in a 1:1 scale with the real car. The rear shark fin serves as an essential aerodynamic tool for reducing drag.
![]()
![]()
![]()
![]()
△A reserved cross axle allows for attaching a handle. Once installed, you can rotate it to control the roof’s forward-backward movement, revealing the dashboard inside.
![]()
![]()
![]()
△The front end of the windshield also has a limit design, preventing it from opening beyond a certain point. The rear wing is adjustable to multiple angles, providing greater downforce. The underside of the chassis is aesthetically pleasing and reveals the engine linkage functionality.
Appearance: Extremely high restoration accuracy, with highly glossy fender flares.
Structure: Modular design with quick-attach and quick-detach power features.
Quality: The parts are relatively hard, with unbeatable quality transfer decals and clear printed pieces.
Functionality: Suitable for static display and dynamic play.
Summary: The assembly difficulty leans toward challenging.
The product is manufactured by JIESTAR, with hard connector parts and strong clamping force.
The instruction manual can be described as perfect-level and beginner-friendly. With over 2000 pieces, the manual is 3cm thick, which reflects the detailed steps inside.
The designer showcases exceptional design skills, with modular design and extremely sturdy structure, utilizing connectors to the fullest. The overall product gives an illusion from afar that it’s not made of bricks.
All in all, this is a sports car worth purchasing.
(These are just my personal opinions. If you disagree, feel free to ignore.)
11/15/2024
Eikee 1/10 Y10000 SolusGT McLaren Solus GT w/ PF Parts
Pictures updated.
![]()
![]()
![]()
![]()
![]()
Material: ABS
Size: 49.5 × 24.3 × 15.2cm / 19.37 x 9.56 x 5.98"
Pieces: 2135 pcs
Scale: 1/10
Includes:
- Main building block
- Instructions
Features:
- Simulated F1 chassis
- 1:1 scaled-down wheel hub
- New accessory mold
- Interactive steering, engine, and cockpit
11/20/2024
Eikee 1/10 Y10000 SolusGT McLaren Solus GT w/ PF Parts Review Video updated.
c/o 725toys via YouTube
11/26/2024
Eikee 1/10 Y10000 SolusGT McLaren Solus GT w/ PF Parts Review updated.
c/o 积木堂 via WeChat
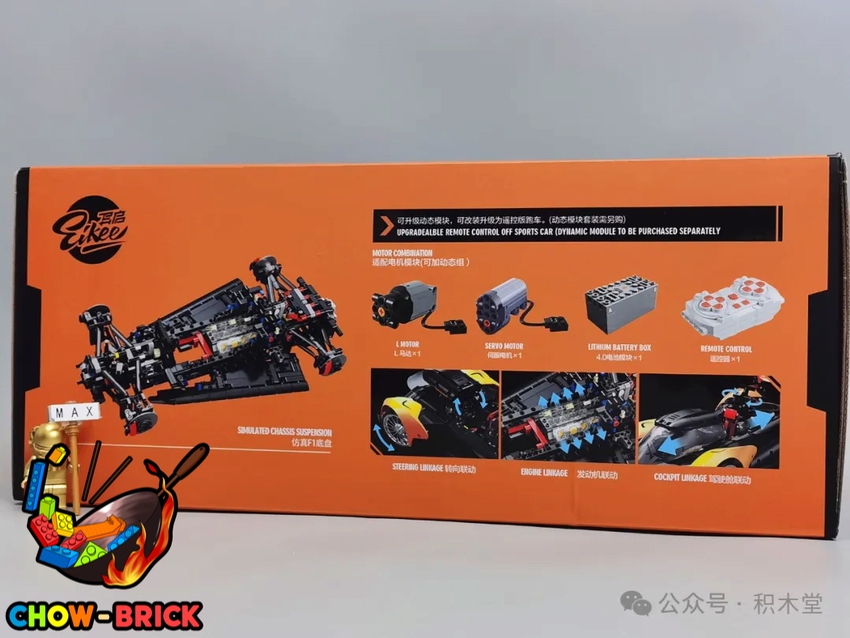
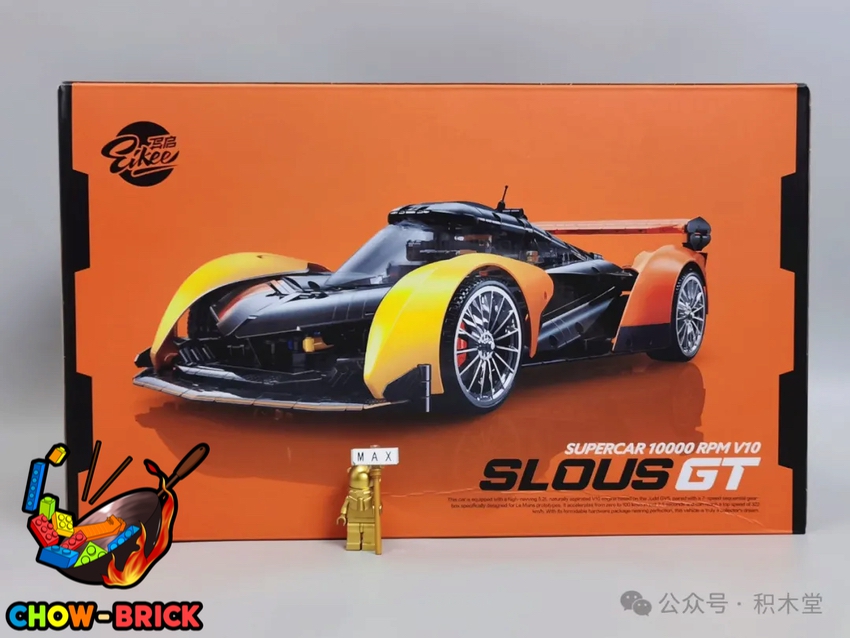
△From the appearance of the box, my earlier impressions were confirmed—this is a brand created by young people. The box looks just like a shoe box, the kind young people loved back in the day. The front features a plain background with a rendered image of the model, and the back showcases a large brand logo (“Eikee”). The promotional image indicates 2135+ pieces and dimensions of 49.5 × 24.3 × 15.2 cm. From the sides of the box, it’s evident that the brand put a lot of effort into this product, including features like quick assembly/disassembly loved by domestic enthusiasts and 1:1 scaled miniature car rims.
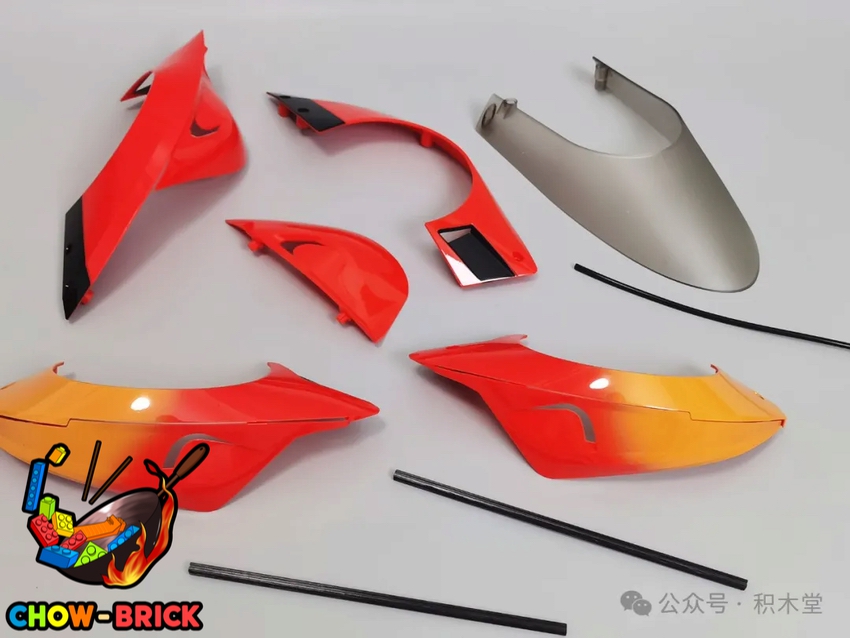
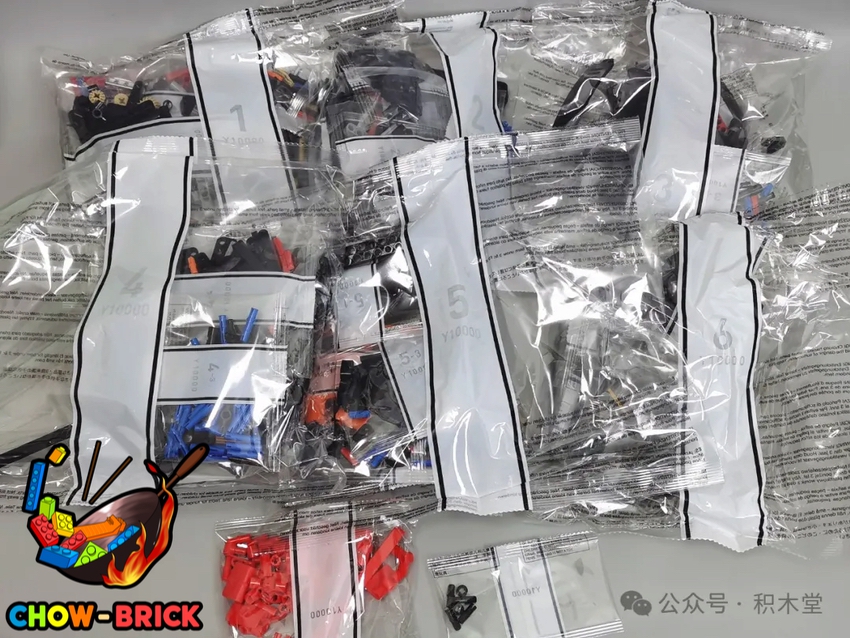

△The set is divided into six major steps. The wheels come semi-pre-assembled, while another cardboard box contains specially molded parts. It also includes two carbon fiber cross axles.

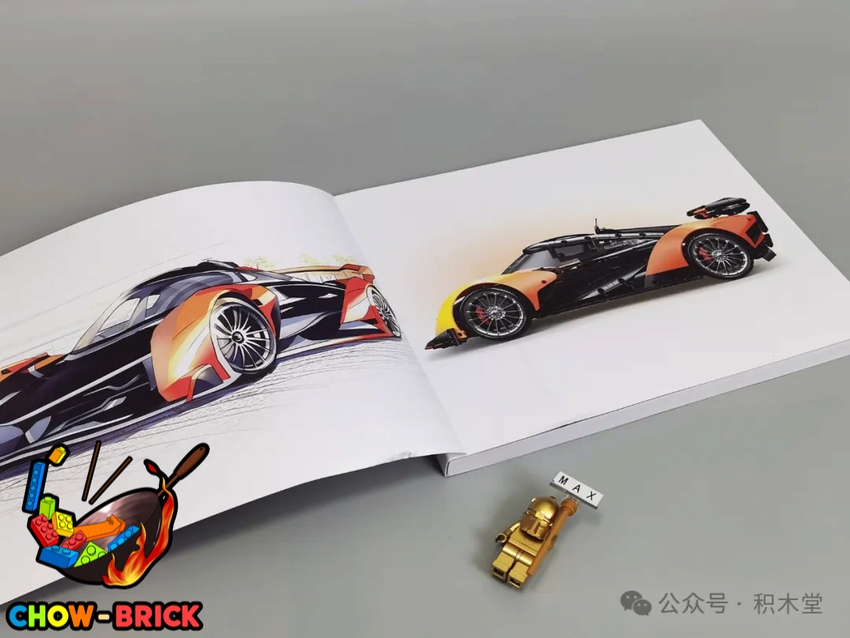
△The instruction manual for over 2,000 pieces is nearly 3 cm thick, demonstrating the richness and detail of the assembly process. The first few pages feature beautiful rendered images and rarely seen internal structure diagrams for domestic brands.
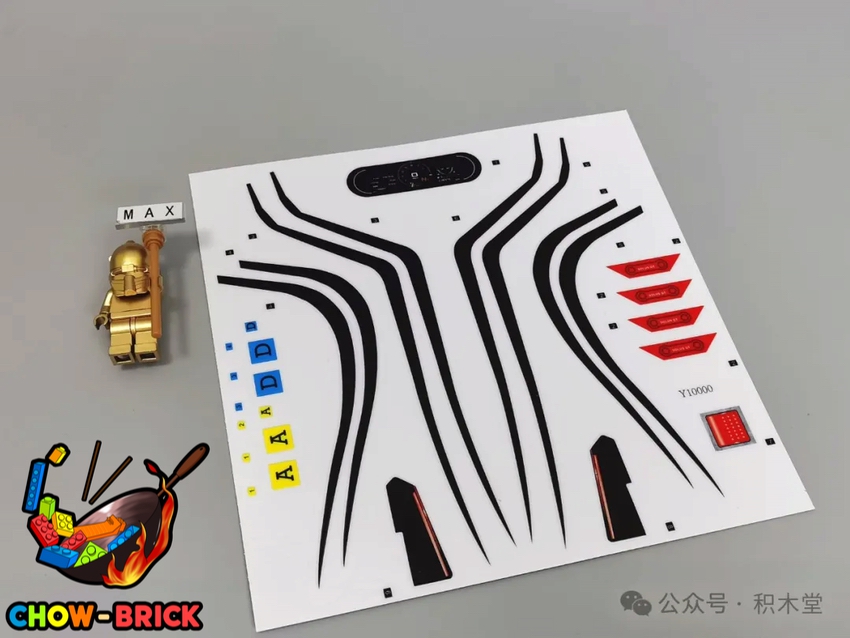
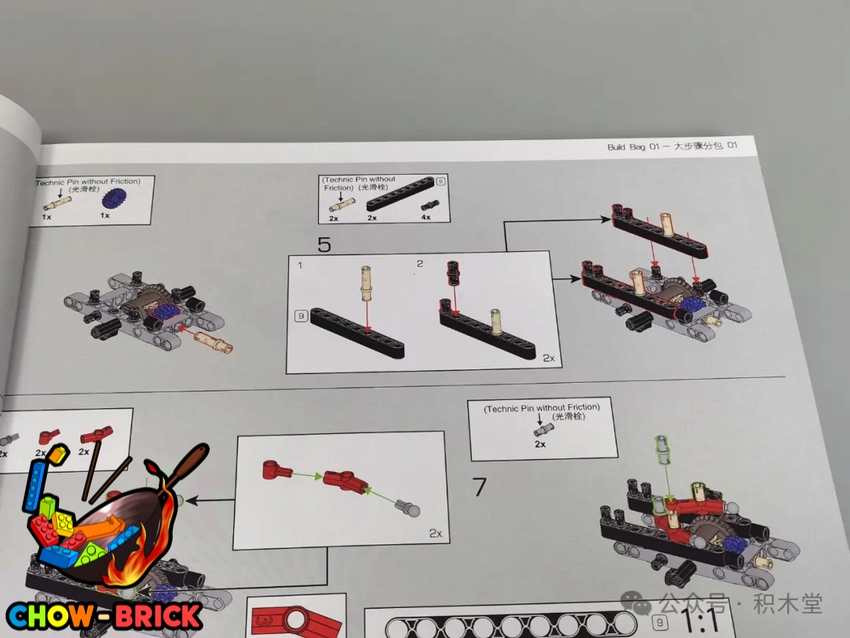
△Each step in the manual includes a photo of the completed state and uses only a few parts, making for a very comfortable building experience. The quick assembly/disassembly feature allows you to first build a static model and then upgrade it using corresponding steps (indicated by green pages). There is one transfer sticker sheet, and its high quality is impressive—highly commendable! The molded parts are coated with UV gloss for a high sheen, and there’s even a curved windshield, which is my first time seeing one on a Technic car.
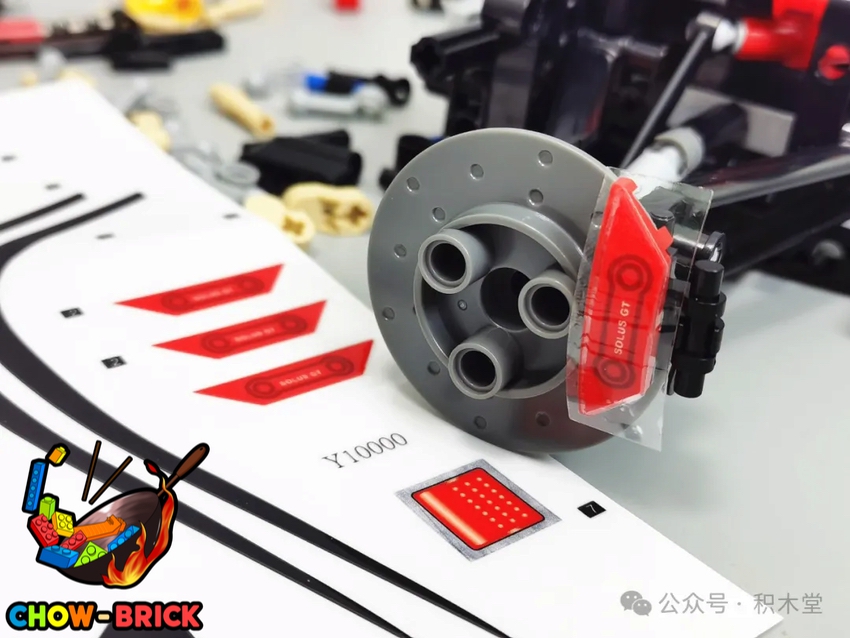
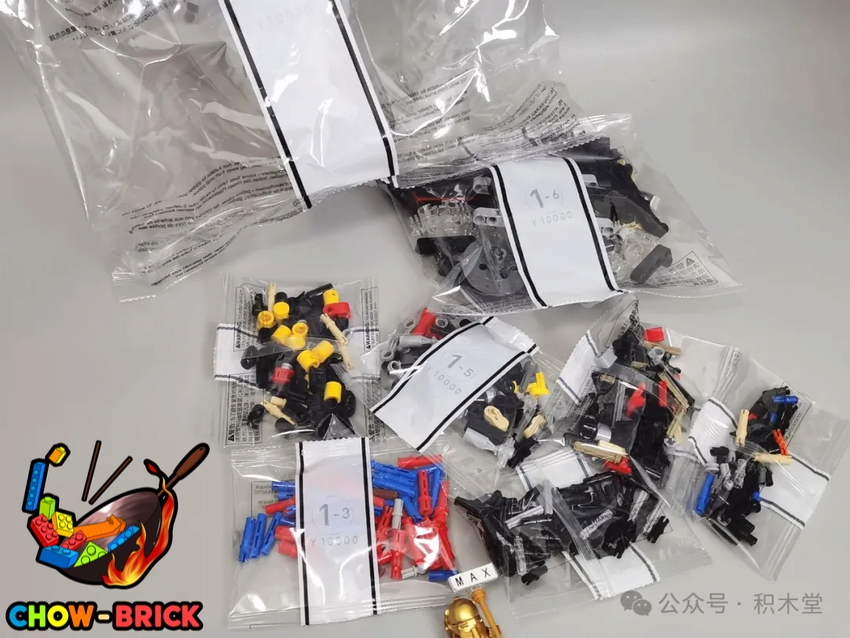
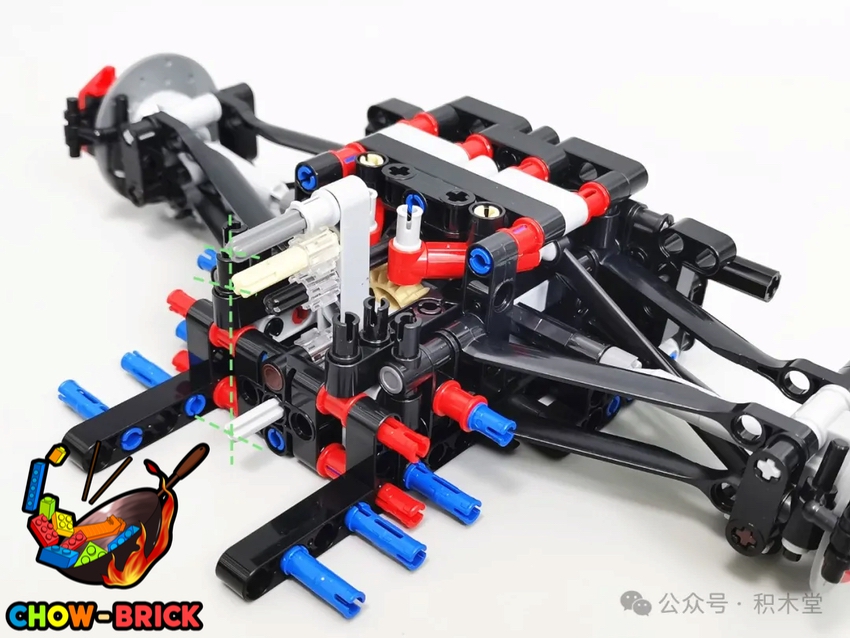
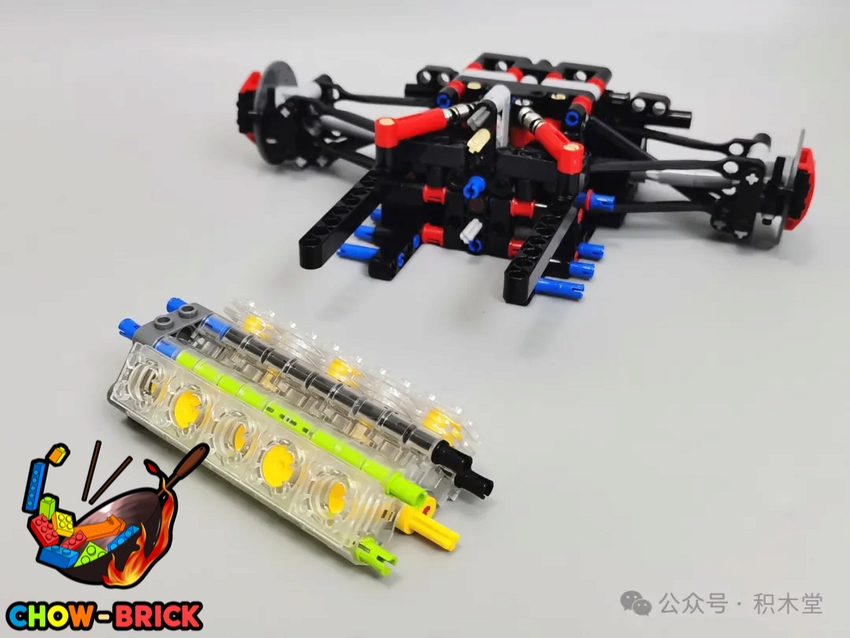
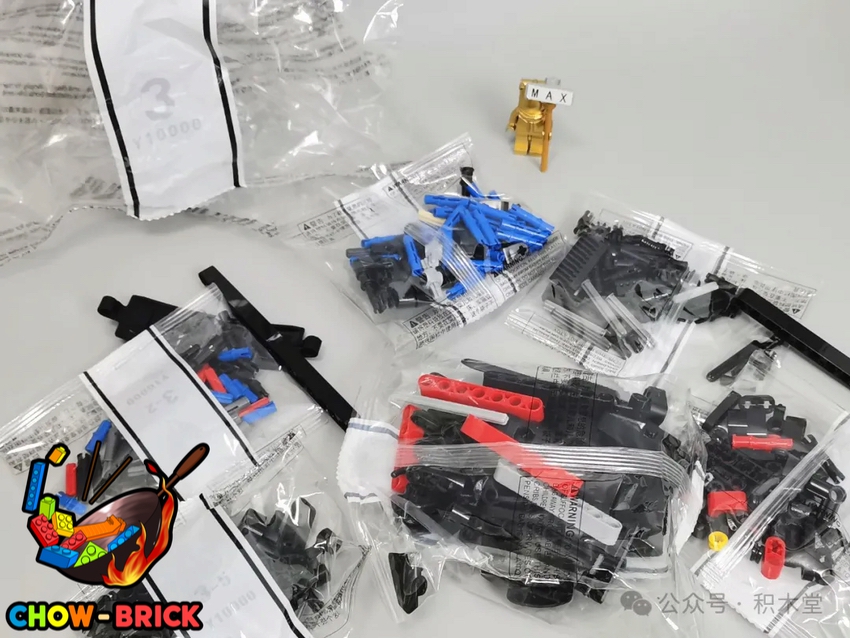
△The parts are divided into perfectly organized steps, with all necessary connectors and pins included in smaller bags for each step—there’s no large shared parts bag. For transfer stickers, remember to apply them first and then remove the transparent layer. The model features an F1-style pushrod suspension system, which is fantastic. Pay attention to the alignment of several axles, as they connect to the motor and enable the engine’s linkage functions. The V10 engine uses a transparent cylinder block, but the short pins are only provided in black, which doesn’t look great. I recommend replacing them with transparent or bright-colored pins (I used green ones from my own collection).
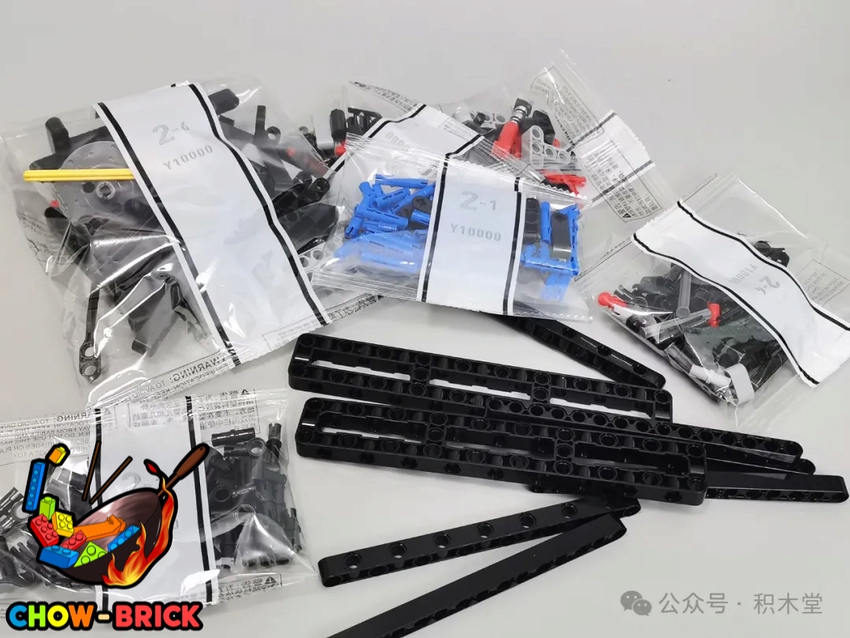
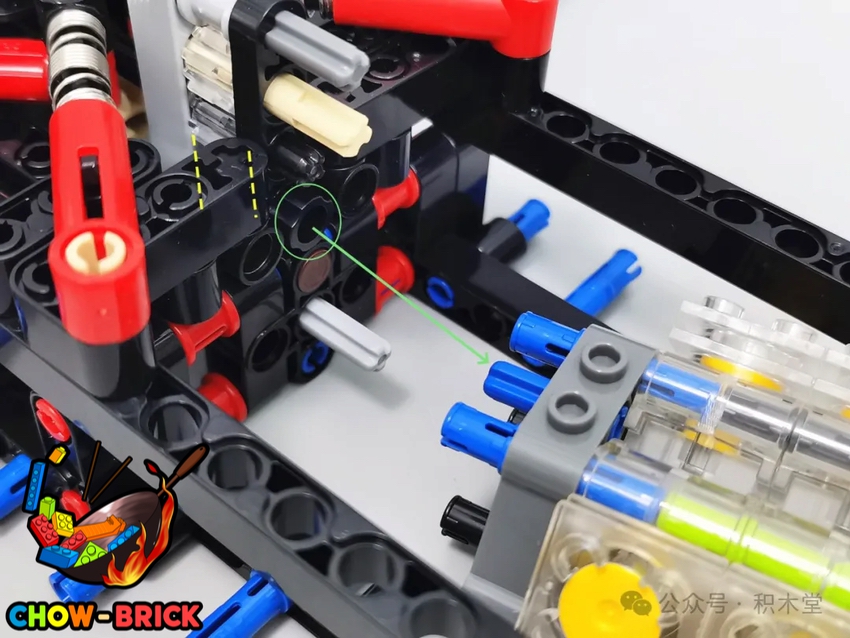
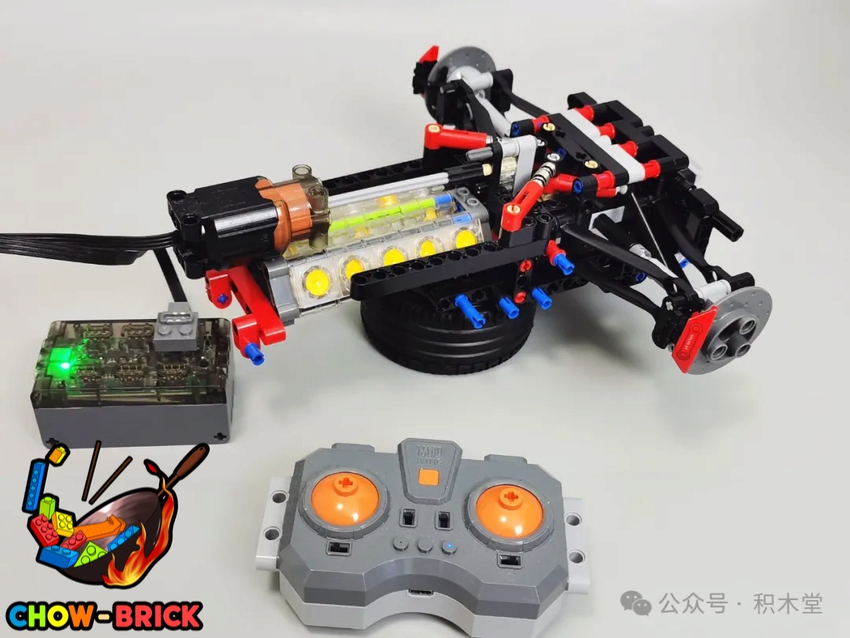
△When installing the engine, the original 1x2 half axle piece can be difficult to position due to a lack of support in the yellow section. I suggest placing it on the engine side first. After assembly, it’s best to test the motor for proper linkage functionality.
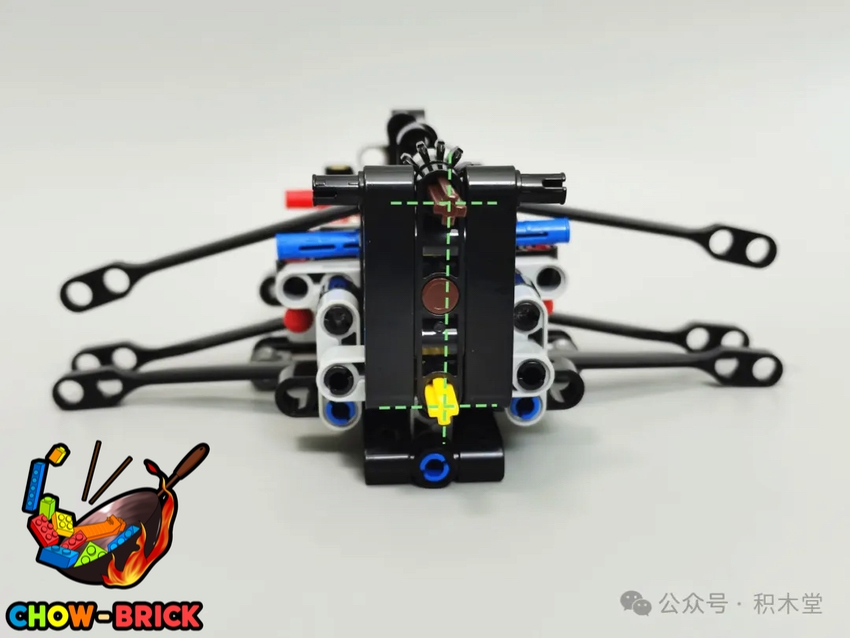
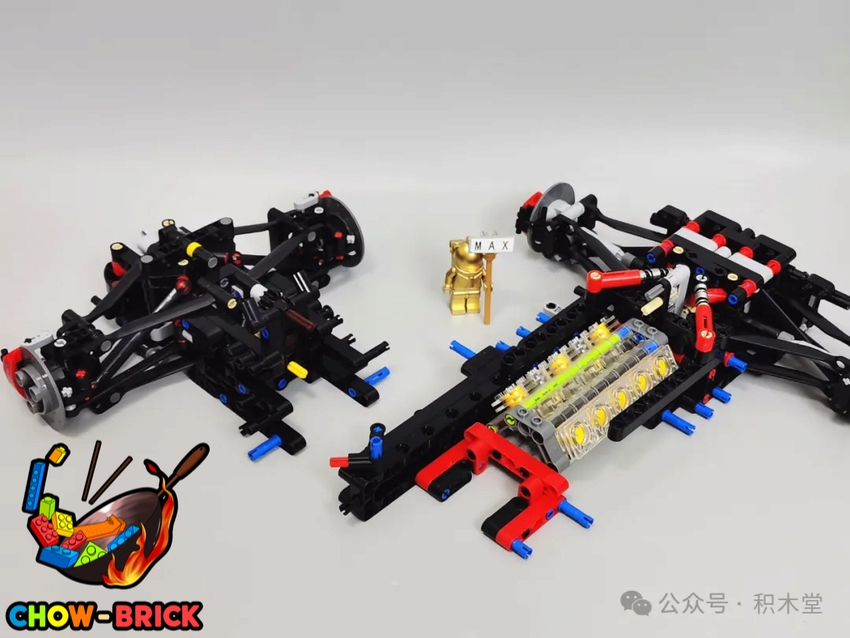

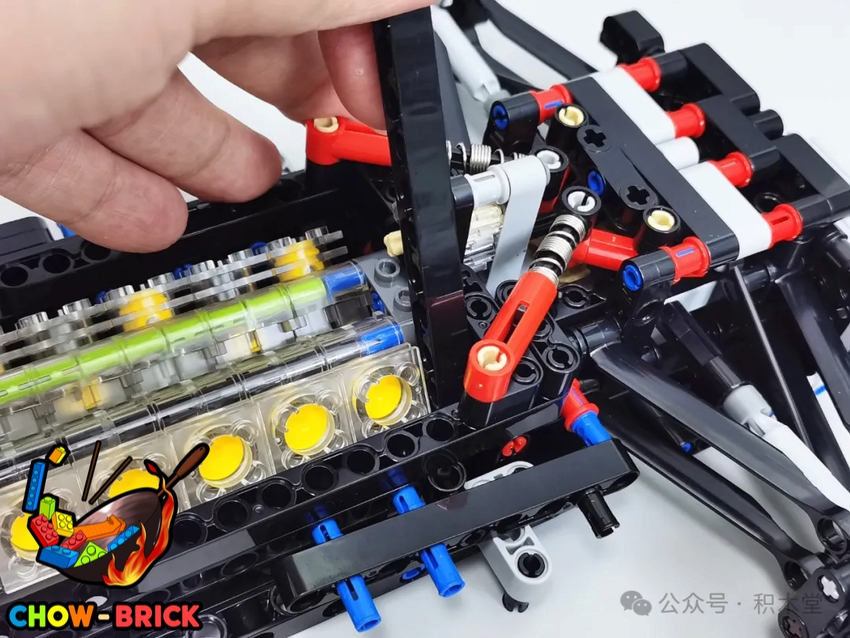
△The front section also requires attention to the alignment of the cross axles and rack for the steering linkage to work properly. During the front and rear module assembly, the thick beams lack support when being installed. You can use a separator or other parts to fill the gaps as temporary support.
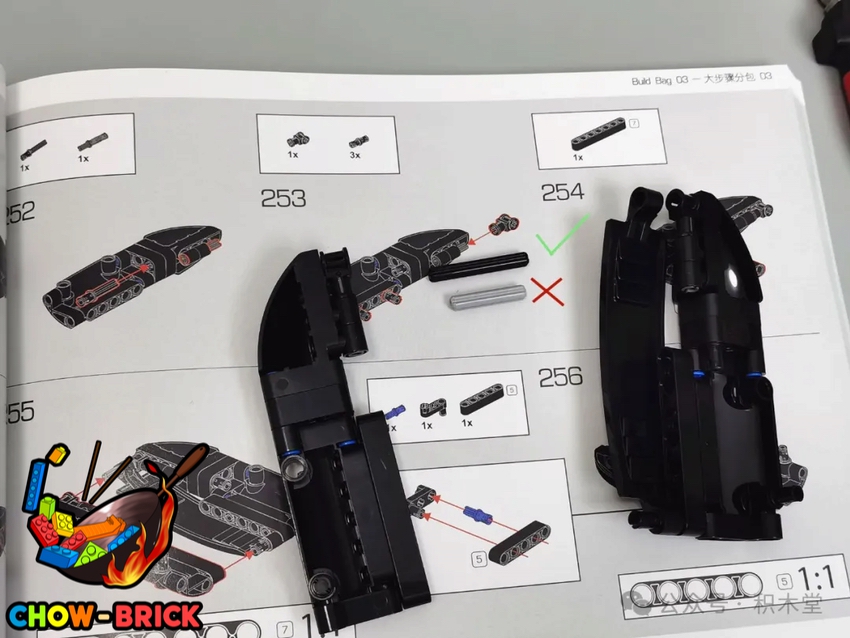
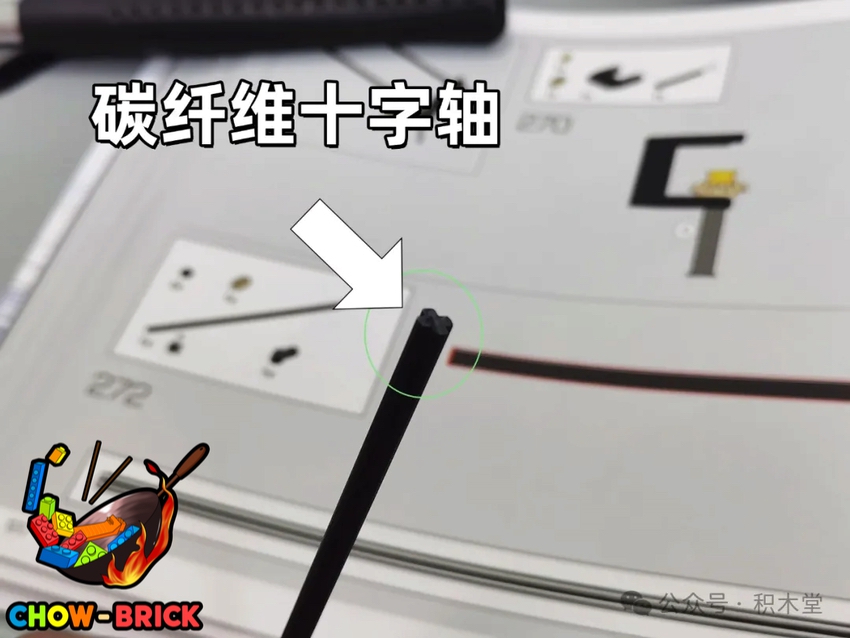
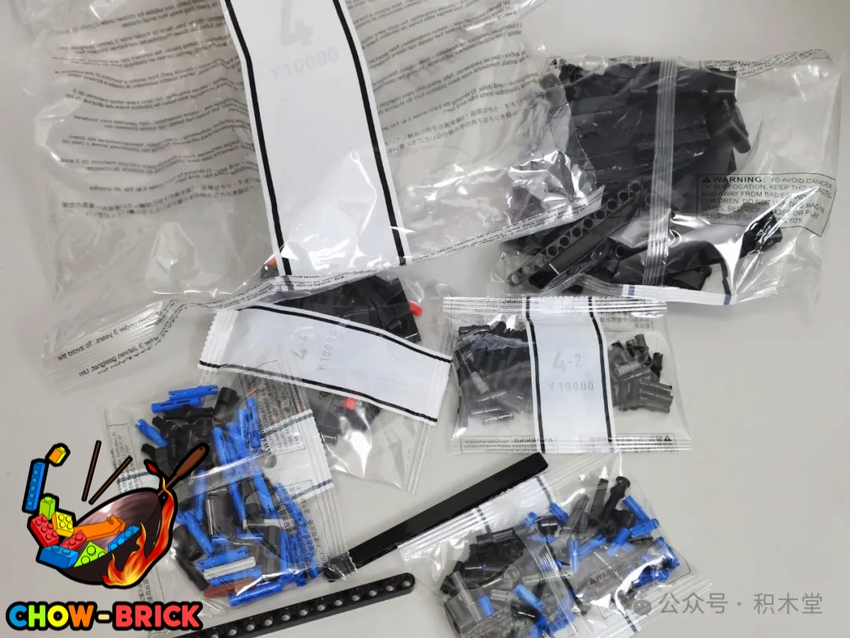
△In step 255, the gray #3 cross axle needs to be replaced with a #4 for proper length during assembly. The entire roof is modular and uses carbon fiber cross axles inside.
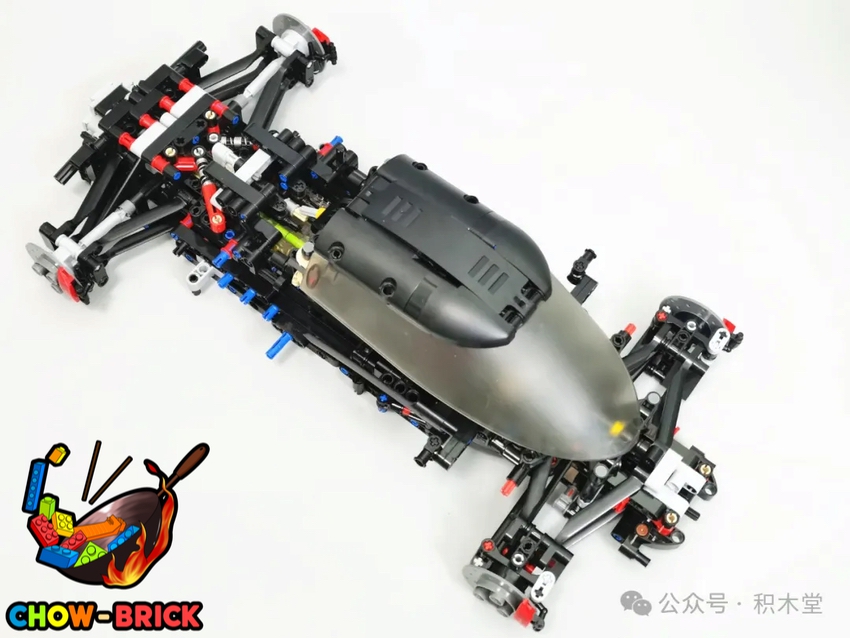
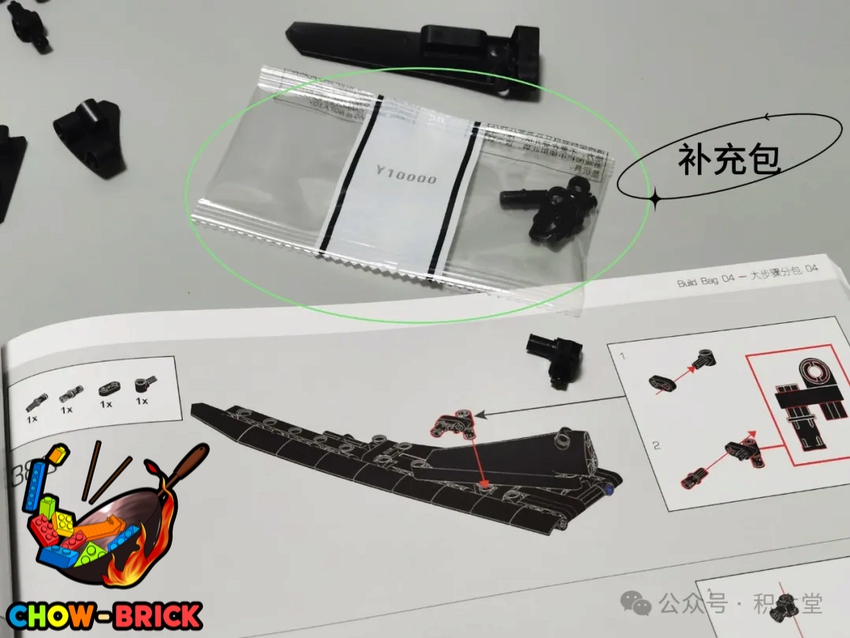
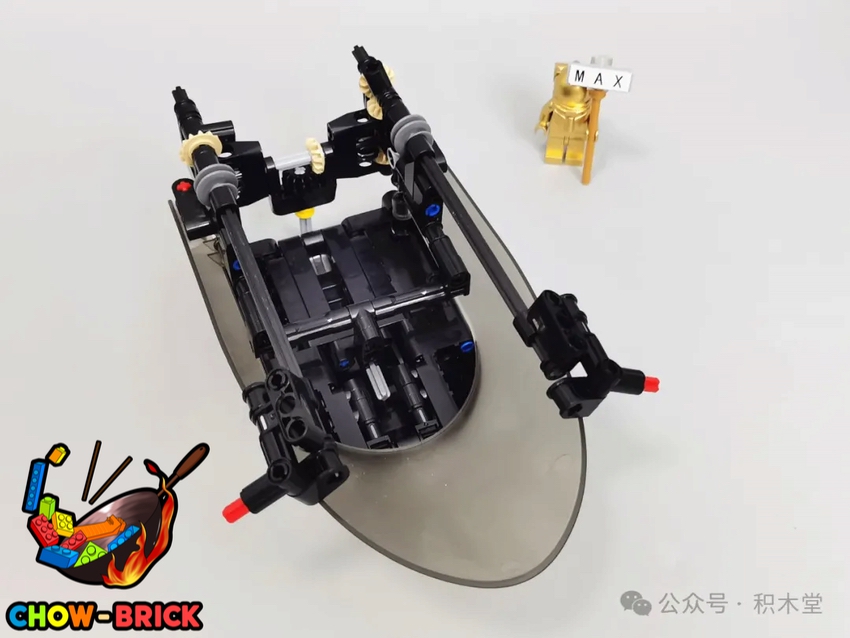
△One issue with the roof’s forward-backward sliding mechanism is excessive torque, making it hard to operate manually. Additionally, the connection between the helical gears and the rack is insufficient, causing functionality issues. Without modifying anything, you can press down on the roof to connect the gears to the rack, restoring normal functionality. In step 383, a part is missing but can be found in the extra parts bag.
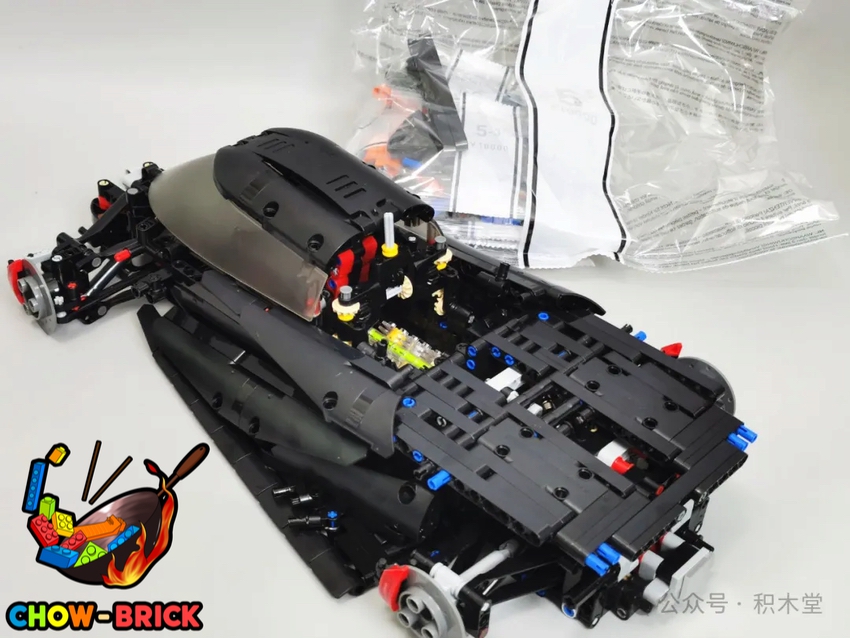

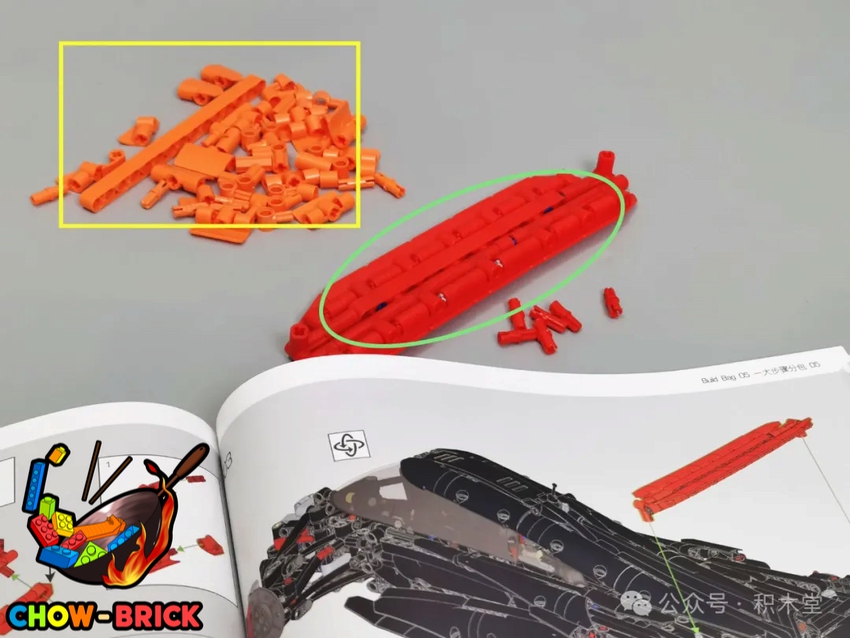
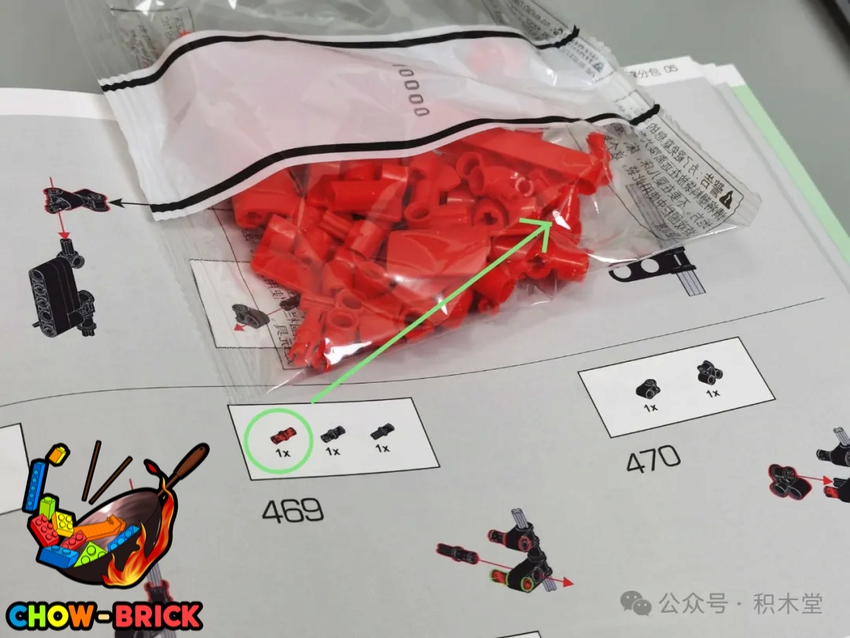
△In step 469, the red short pin is in another extra parts bag. Judging from the parts, the rear wing was originally designed to be orange. After implementing a gradient color scheme from front to back, the rear became red. The brand generously provided an additional set of red rear wing pieces.
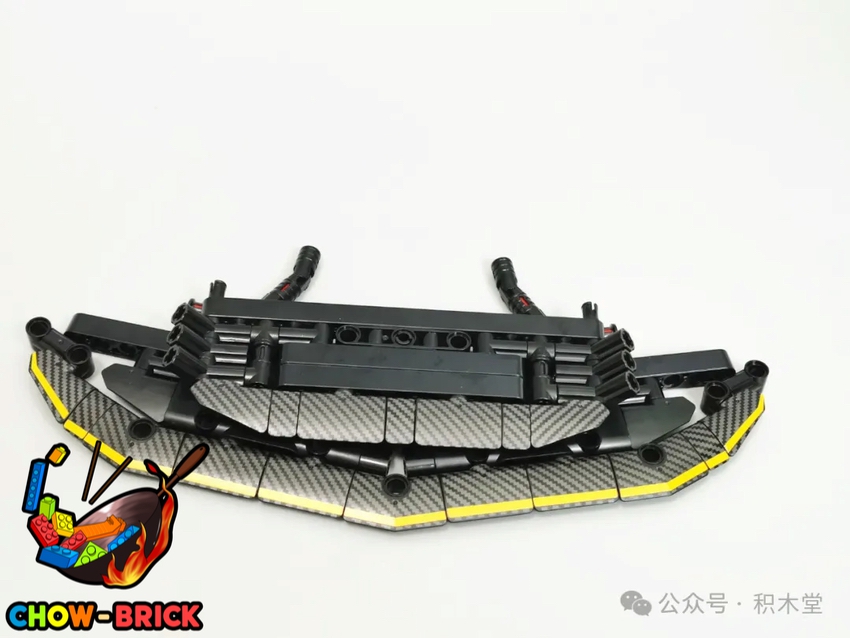
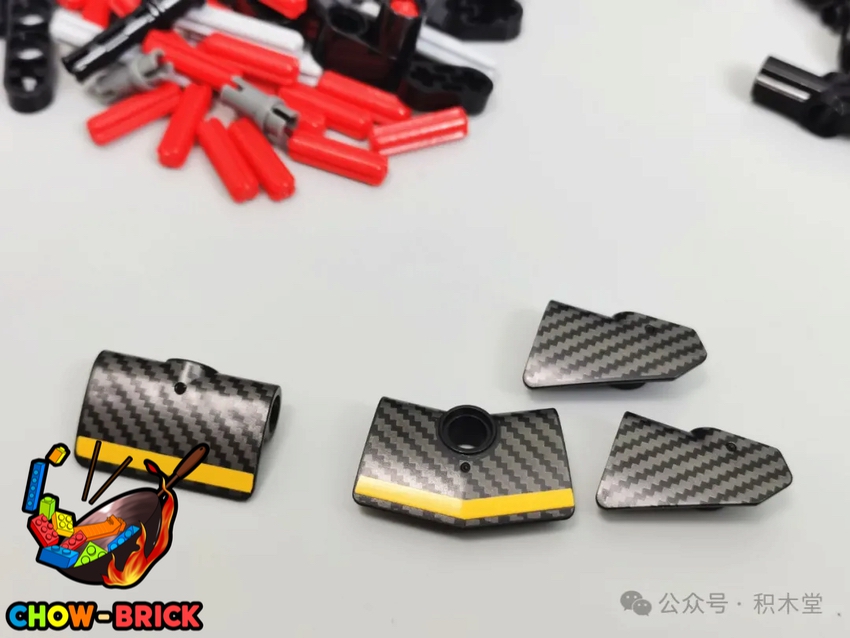
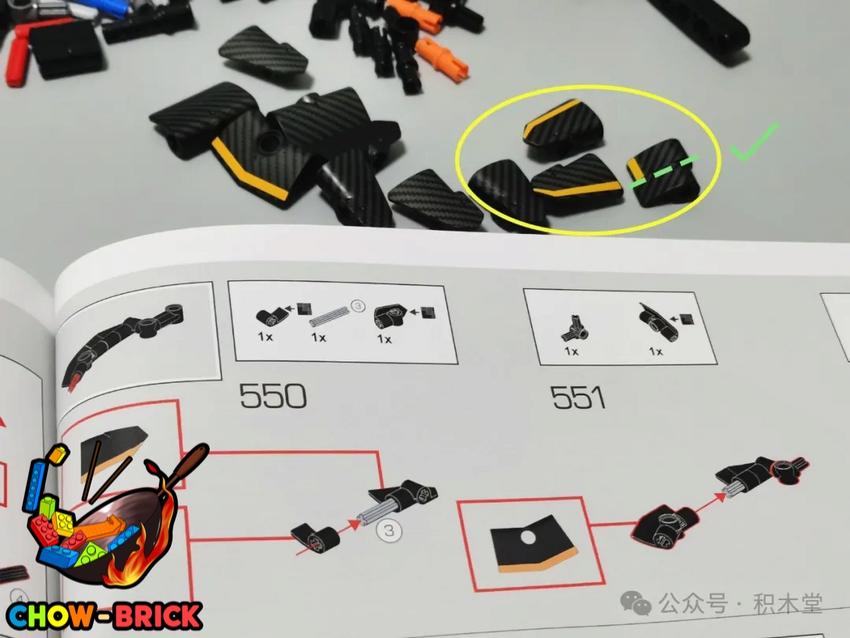
△The front splitter has a dual-layer structure, both made of carbon fiber-printed parts. Pay attention to the lower layer, which features yellow stripes.
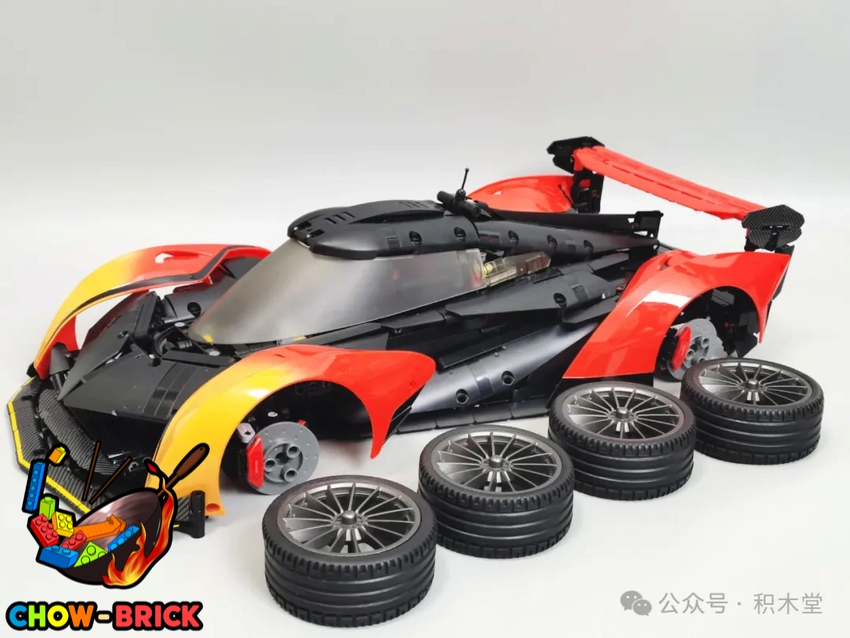
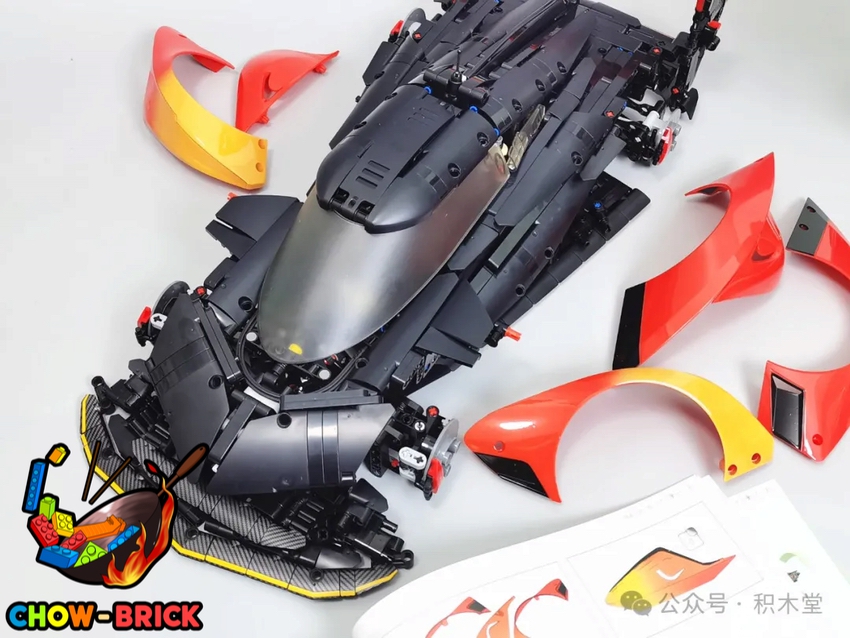
△Finally, attach the fenders and wheels to complete the build.
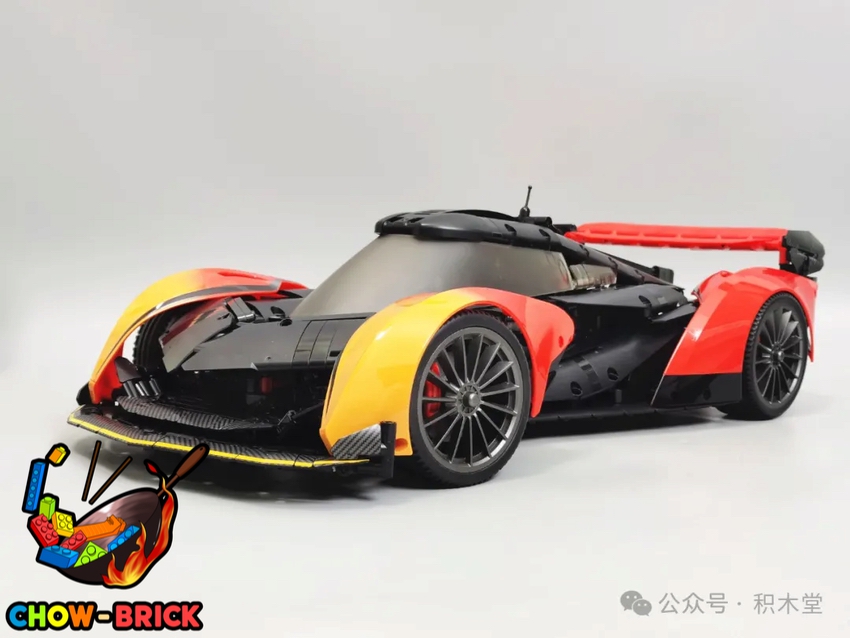
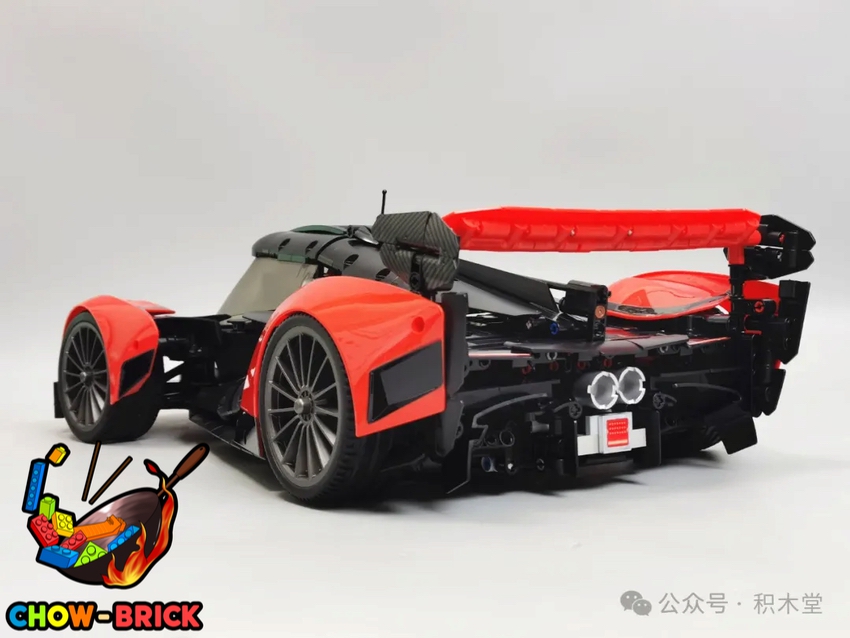
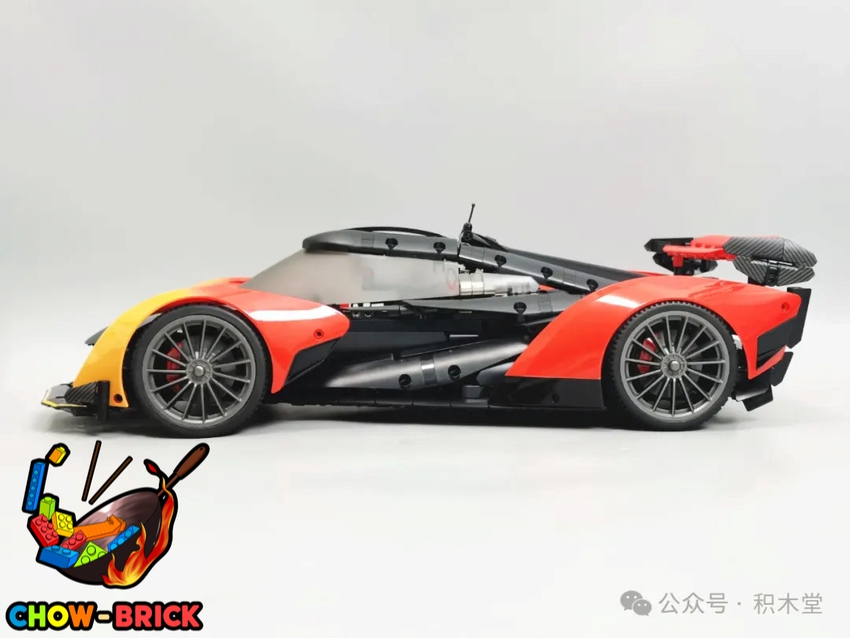
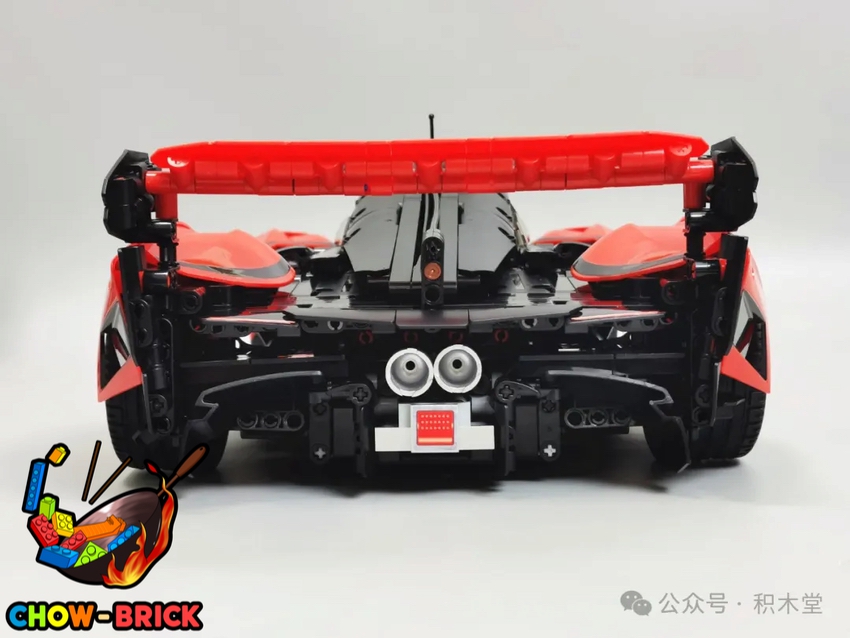
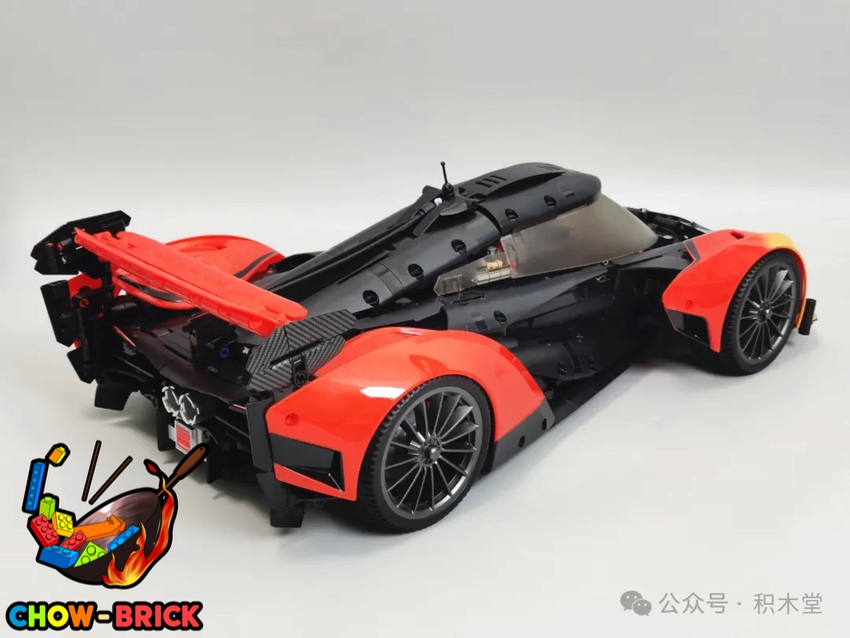
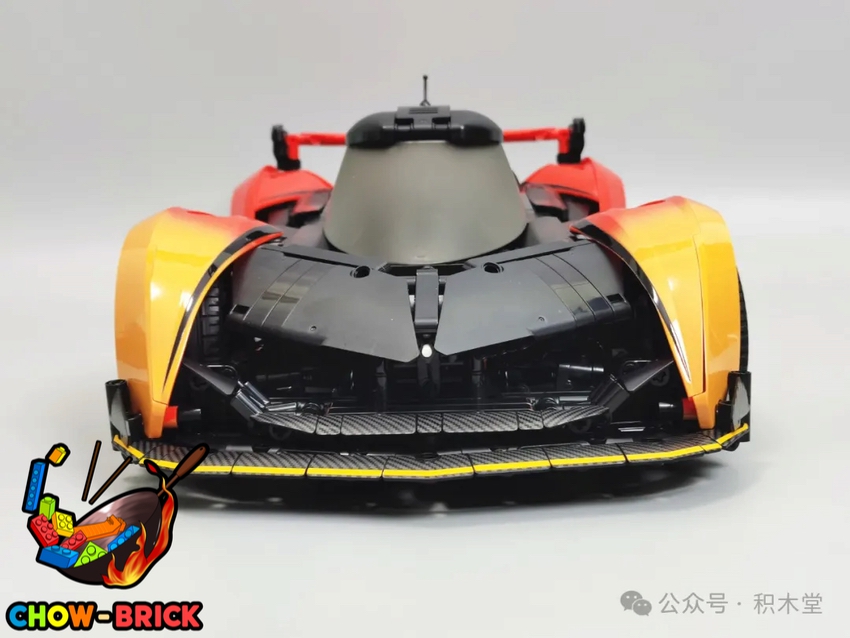
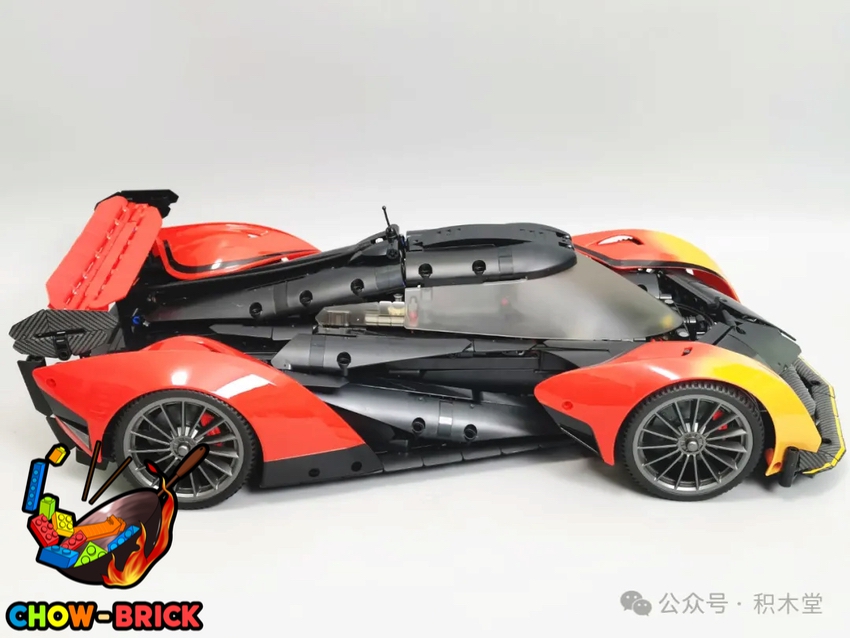
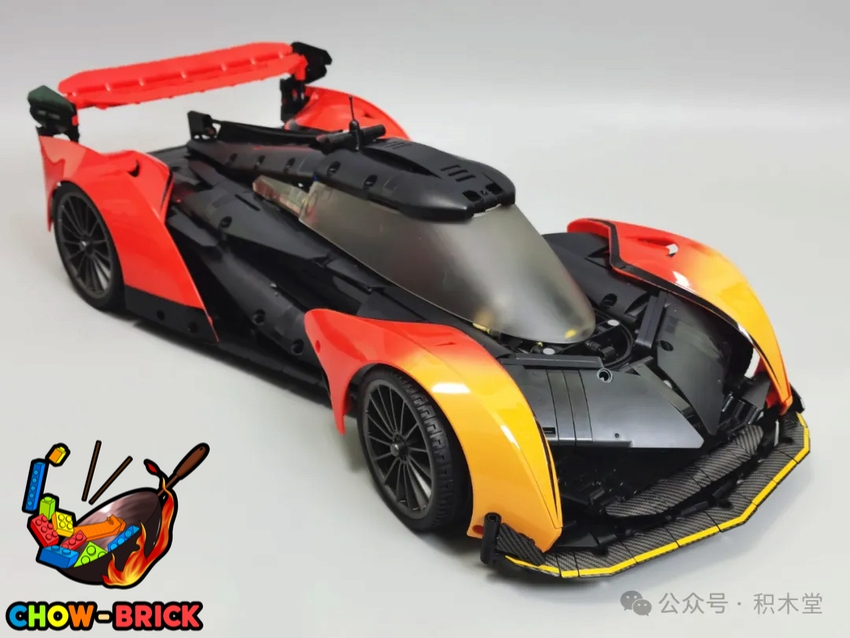
△Finished model, shown in a 360-degree display.
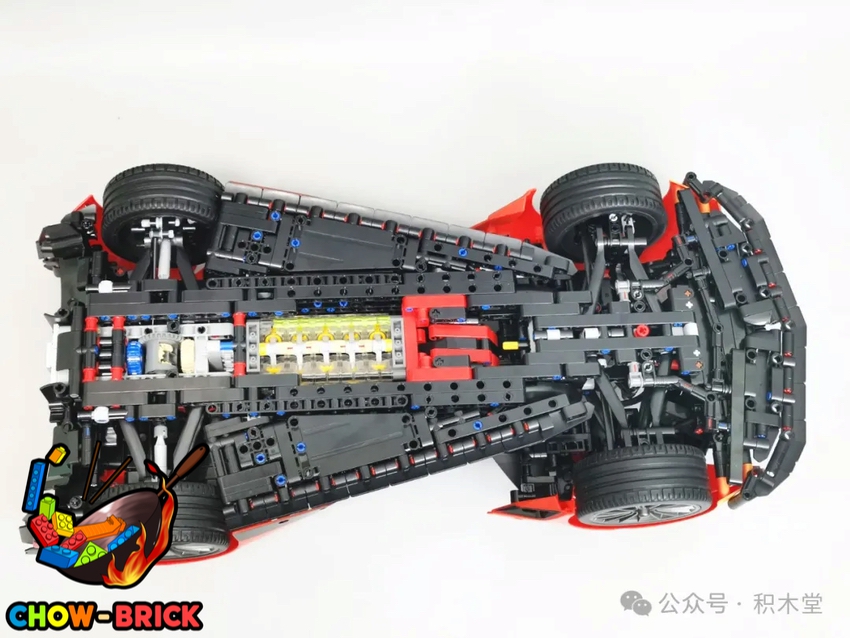
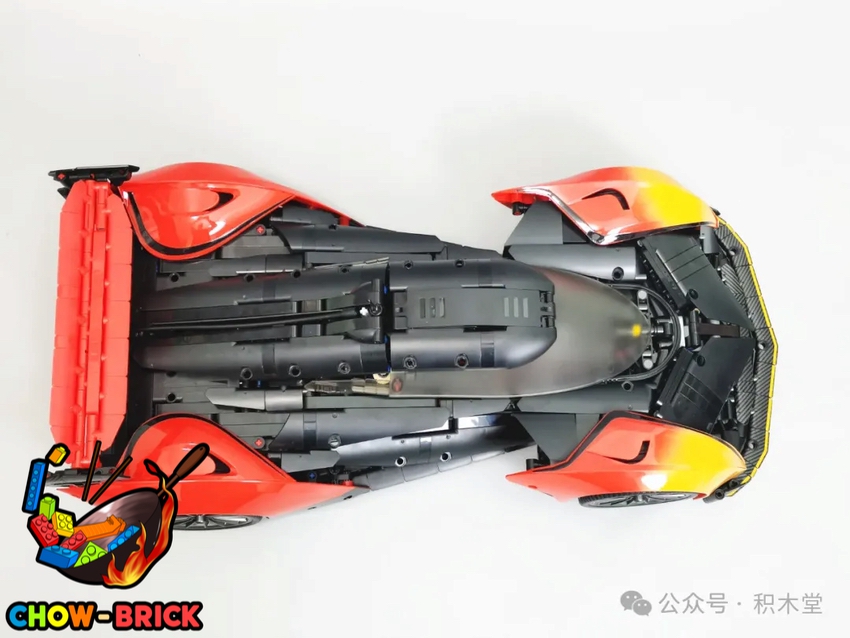
△Top-down and undercarriage views.
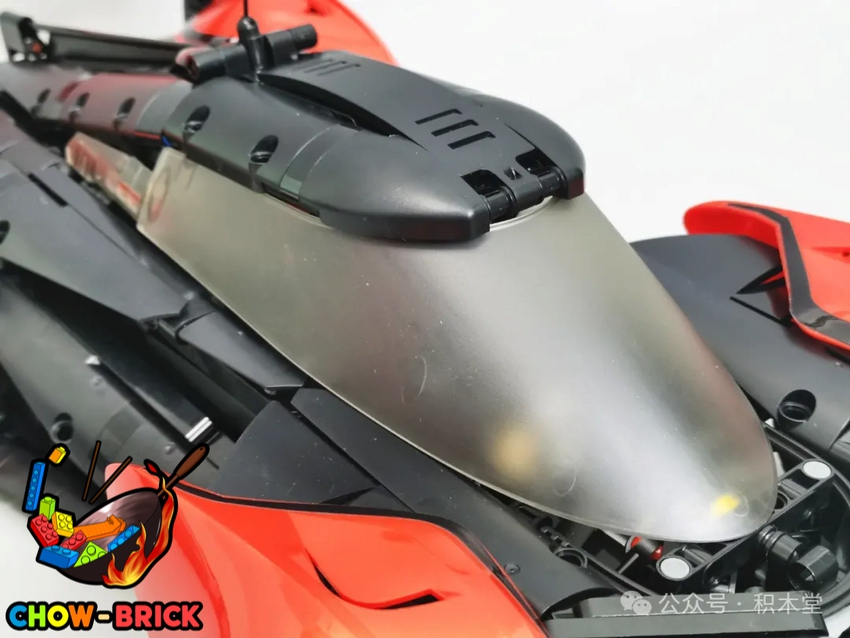
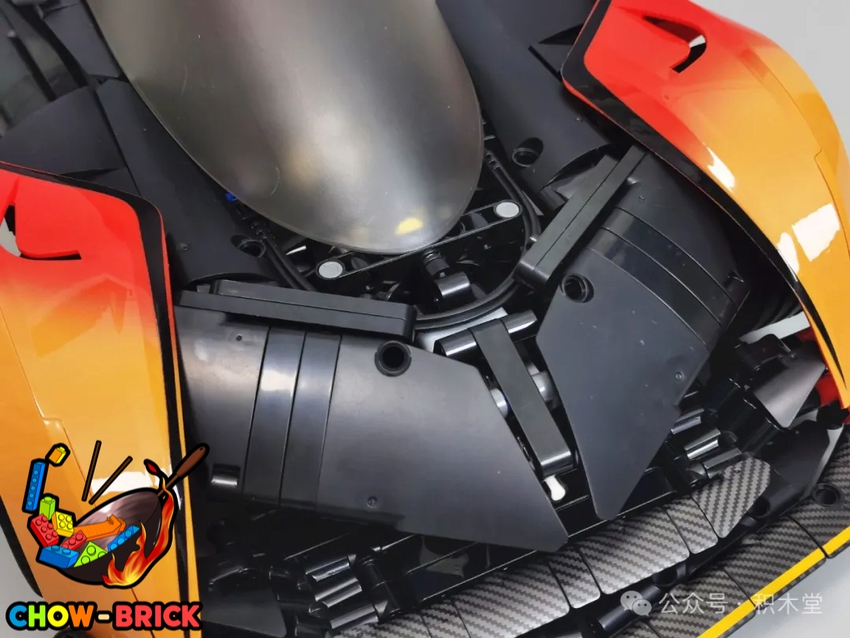
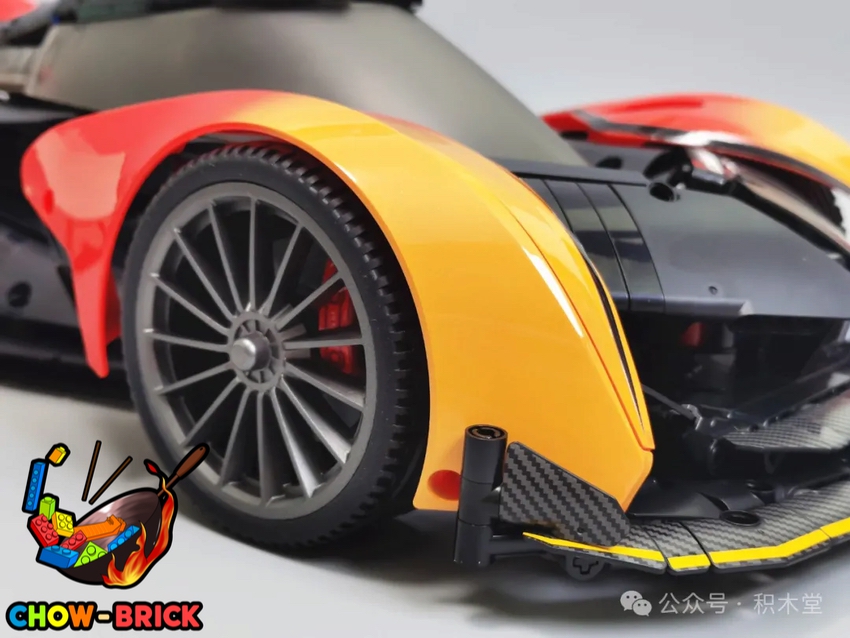
△The front splitter looks very aggressive and exudes a sense of power. A minor issue: the black exterior parts come in both glossy and matte finishes. It would look better if they were unified, but this is just a personal aesthetic preference. The windshield is the most eye-catching feature. Previously, some non-enthusiasts criticized Technic car sets for not including windshields.
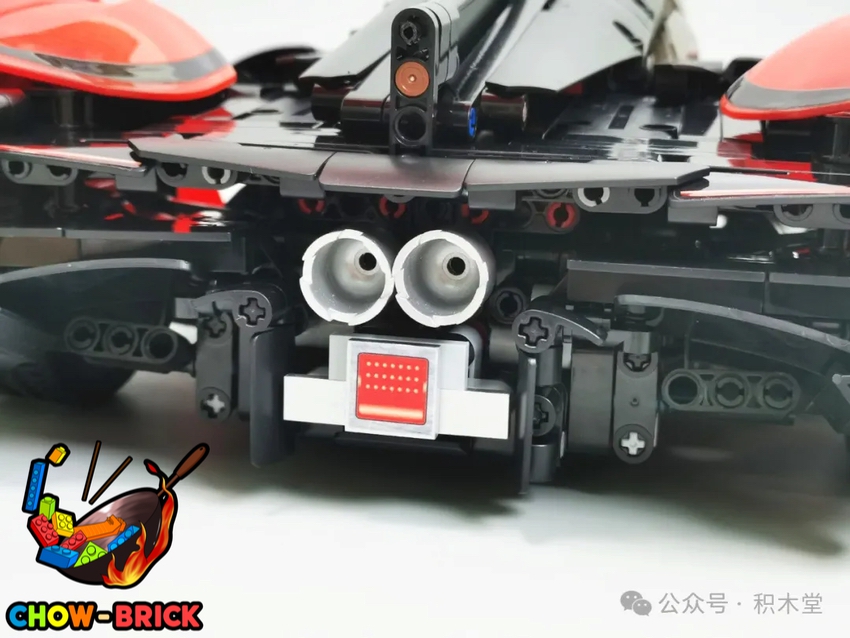
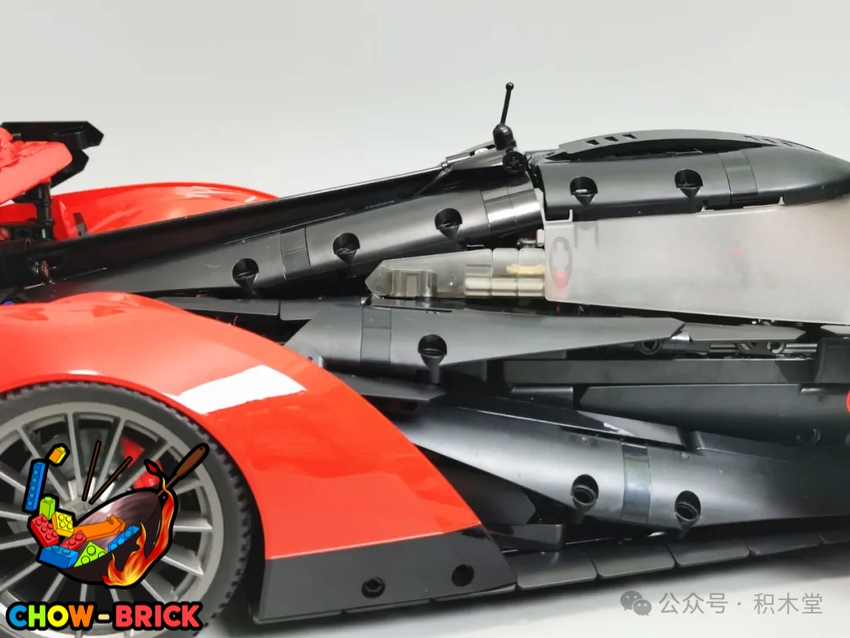
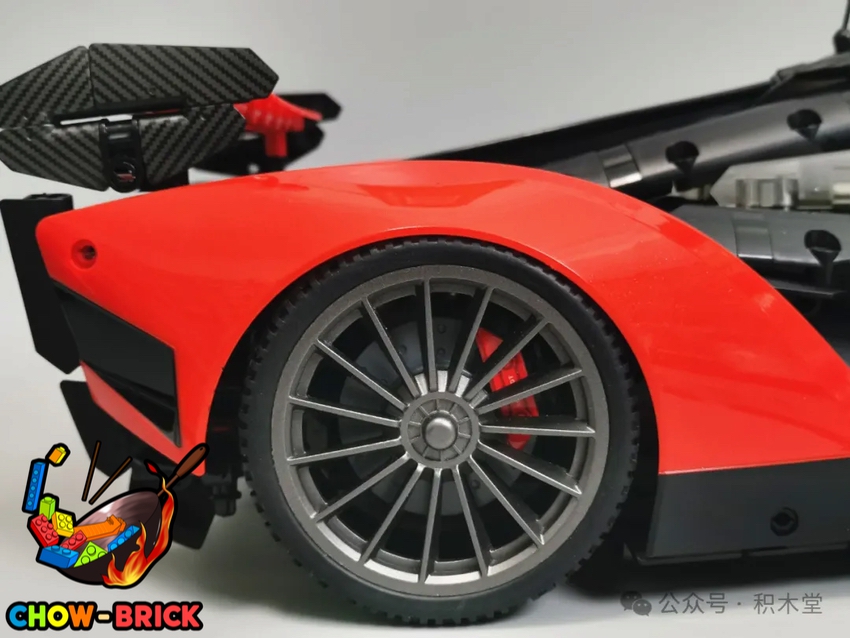
△As you can see, there’s no gap between the wheels and fenders, resulting in limited suspension travel. The wheel rims are beautiful, faithfully recreated in a 1:1 scale with the real car. The rear shark fin serves as an essential aerodynamic tool for reducing drag.
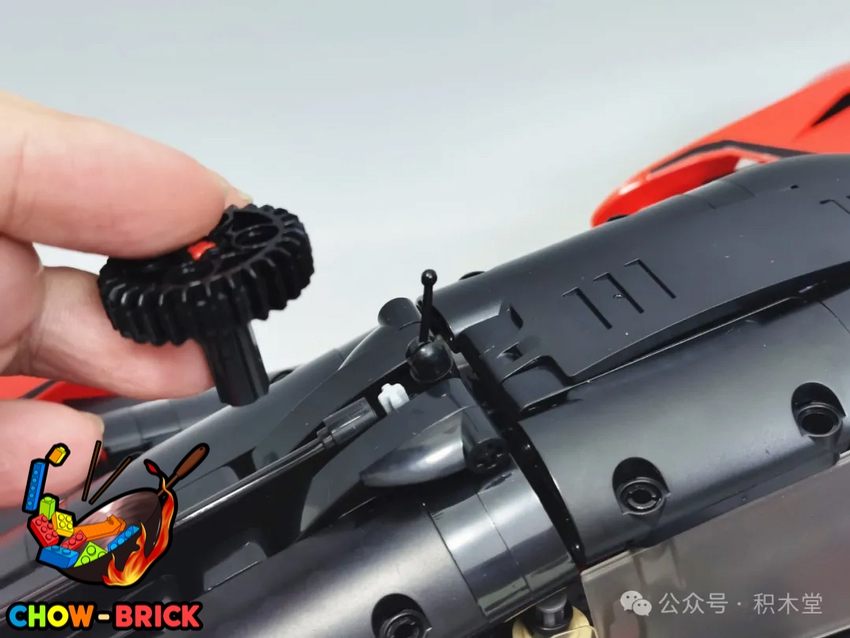
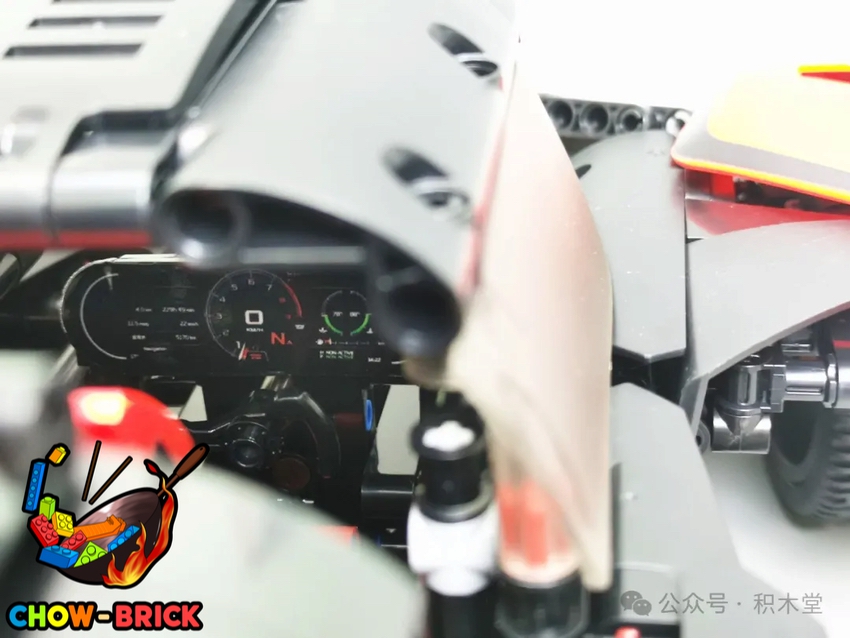
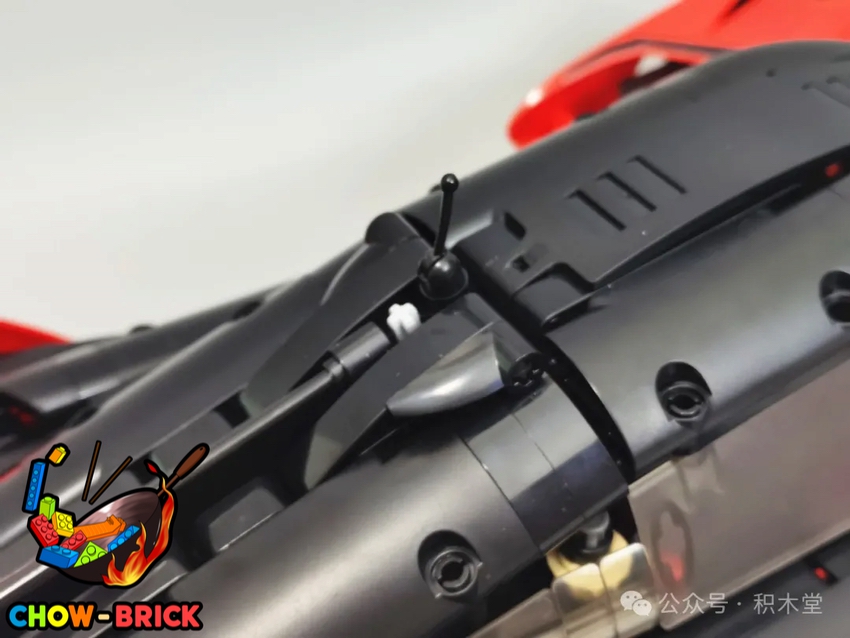

△A reserved cross axle allows for attaching a handle. Once installed, you can rotate it to control the roof’s forward-backward movement, revealing the dashboard inside.
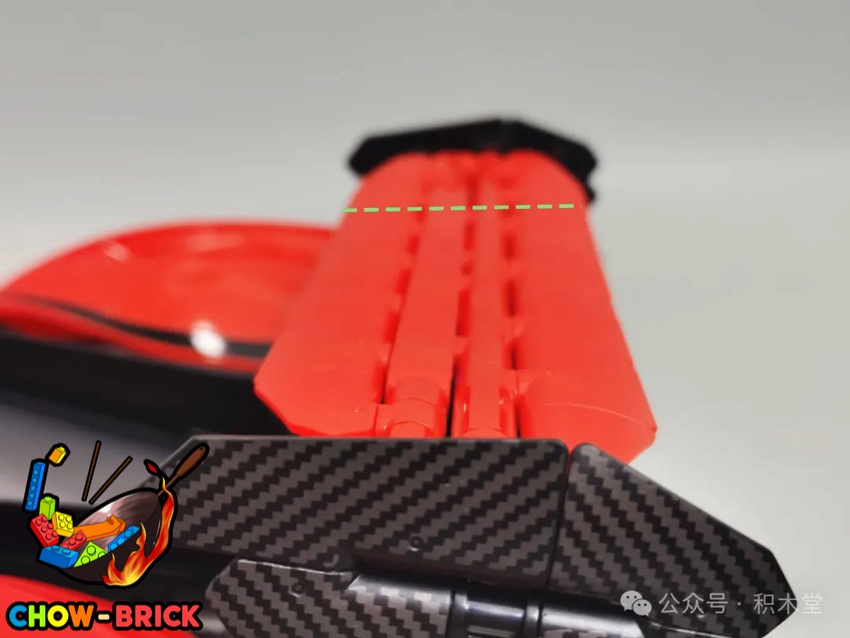
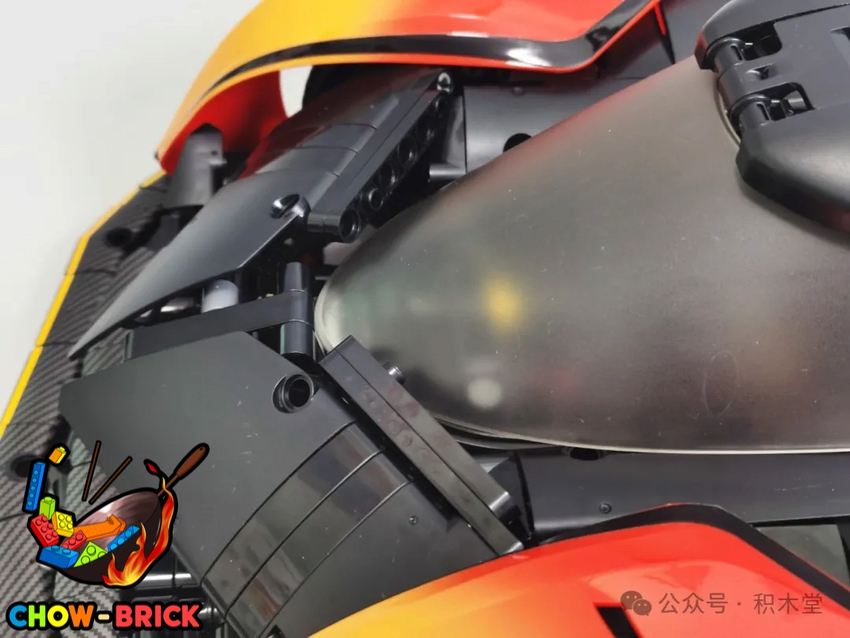
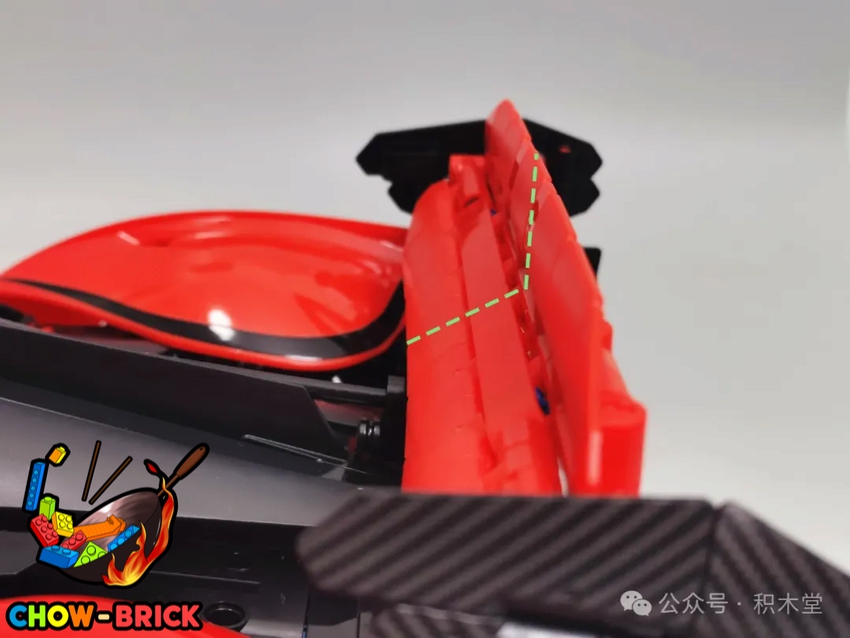
△The front end of the windshield also has a limit design, preventing it from opening beyond a certain point. The rear wing is adjustable to multiple angles, providing greater downforce. The underside of the chassis is aesthetically pleasing and reveals the engine linkage functionality.
Appearance: Extremely high restoration accuracy, with highly glossy fender flares.
Structure: Modular design with quick-attach and quick-detach power features.
Quality: The parts are relatively hard, with unbeatable quality transfer decals and clear printed pieces.
Functionality: Suitable for static display and dynamic play.
Summary: The assembly difficulty leans toward challenging.
The product is manufactured by JIESTAR, with hard connector parts and strong clamping force.
The instruction manual can be described as perfect-level and beginner-friendly. With over 2000 pieces, the manual is 3cm thick, which reflects the detailed steps inside.
The designer showcases exceptional design skills, with modular design and extremely sturdy structure, utilizing connectors to the fullest. The overall product gives an illusion from afar that it’s not made of bricks.
All in all, this is a sports car worth purchasing.
(These are just my personal opinions. If you disagree, feel free to ignore.)
11/15/2024
Eikee 1/10 Y10000 SolusGT McLaren Solus GT w/ PF Parts
Pictures updated.